How to add members to an email list in a GDPR-compliant way (via Zapier)
If you want to simply add members to an email list and don't need them to opt in first, you can read this guide instead.
Let's say, for example, you use an email marketing platform like Mailchimp to inform your members about updates and additional services through a monthly newsletter.
You probably want a way to add each new member signup to an audience (i.e. list) in Mailchimp so you can later send them your monthly newsletter.
This is easy to do using an awesome tool called Zapier that allows you to send your members' data to over 1,000 other 3rd party services like Mailchimp, Trello, Google Sheets, Salesforce, etc.
Here's a quick overview of what our Zapier integration allows you to do. If you don't already have an account, you can join their Free plan here.
According to GDPR, you need to have explicit consent (i.e. opt in) from users when processing their data. What that consent is and how you obtain it is a discussion meant for you and your lawyer — but there are some use cases we can help you with.
You might need explicit consent to send your members' data to another 3rd party, especially ones that are marketing in nature. Those typically require an unchecked checkbox to be explicitly agreed to by the end user.
Below are the steps to set all this up and get explicit consent from your members. We'll be using Mailchimp in this example, but you could repurpose these steps for other email platforms like ConvertKit, Drip, ActiveCampaign, etc.
-
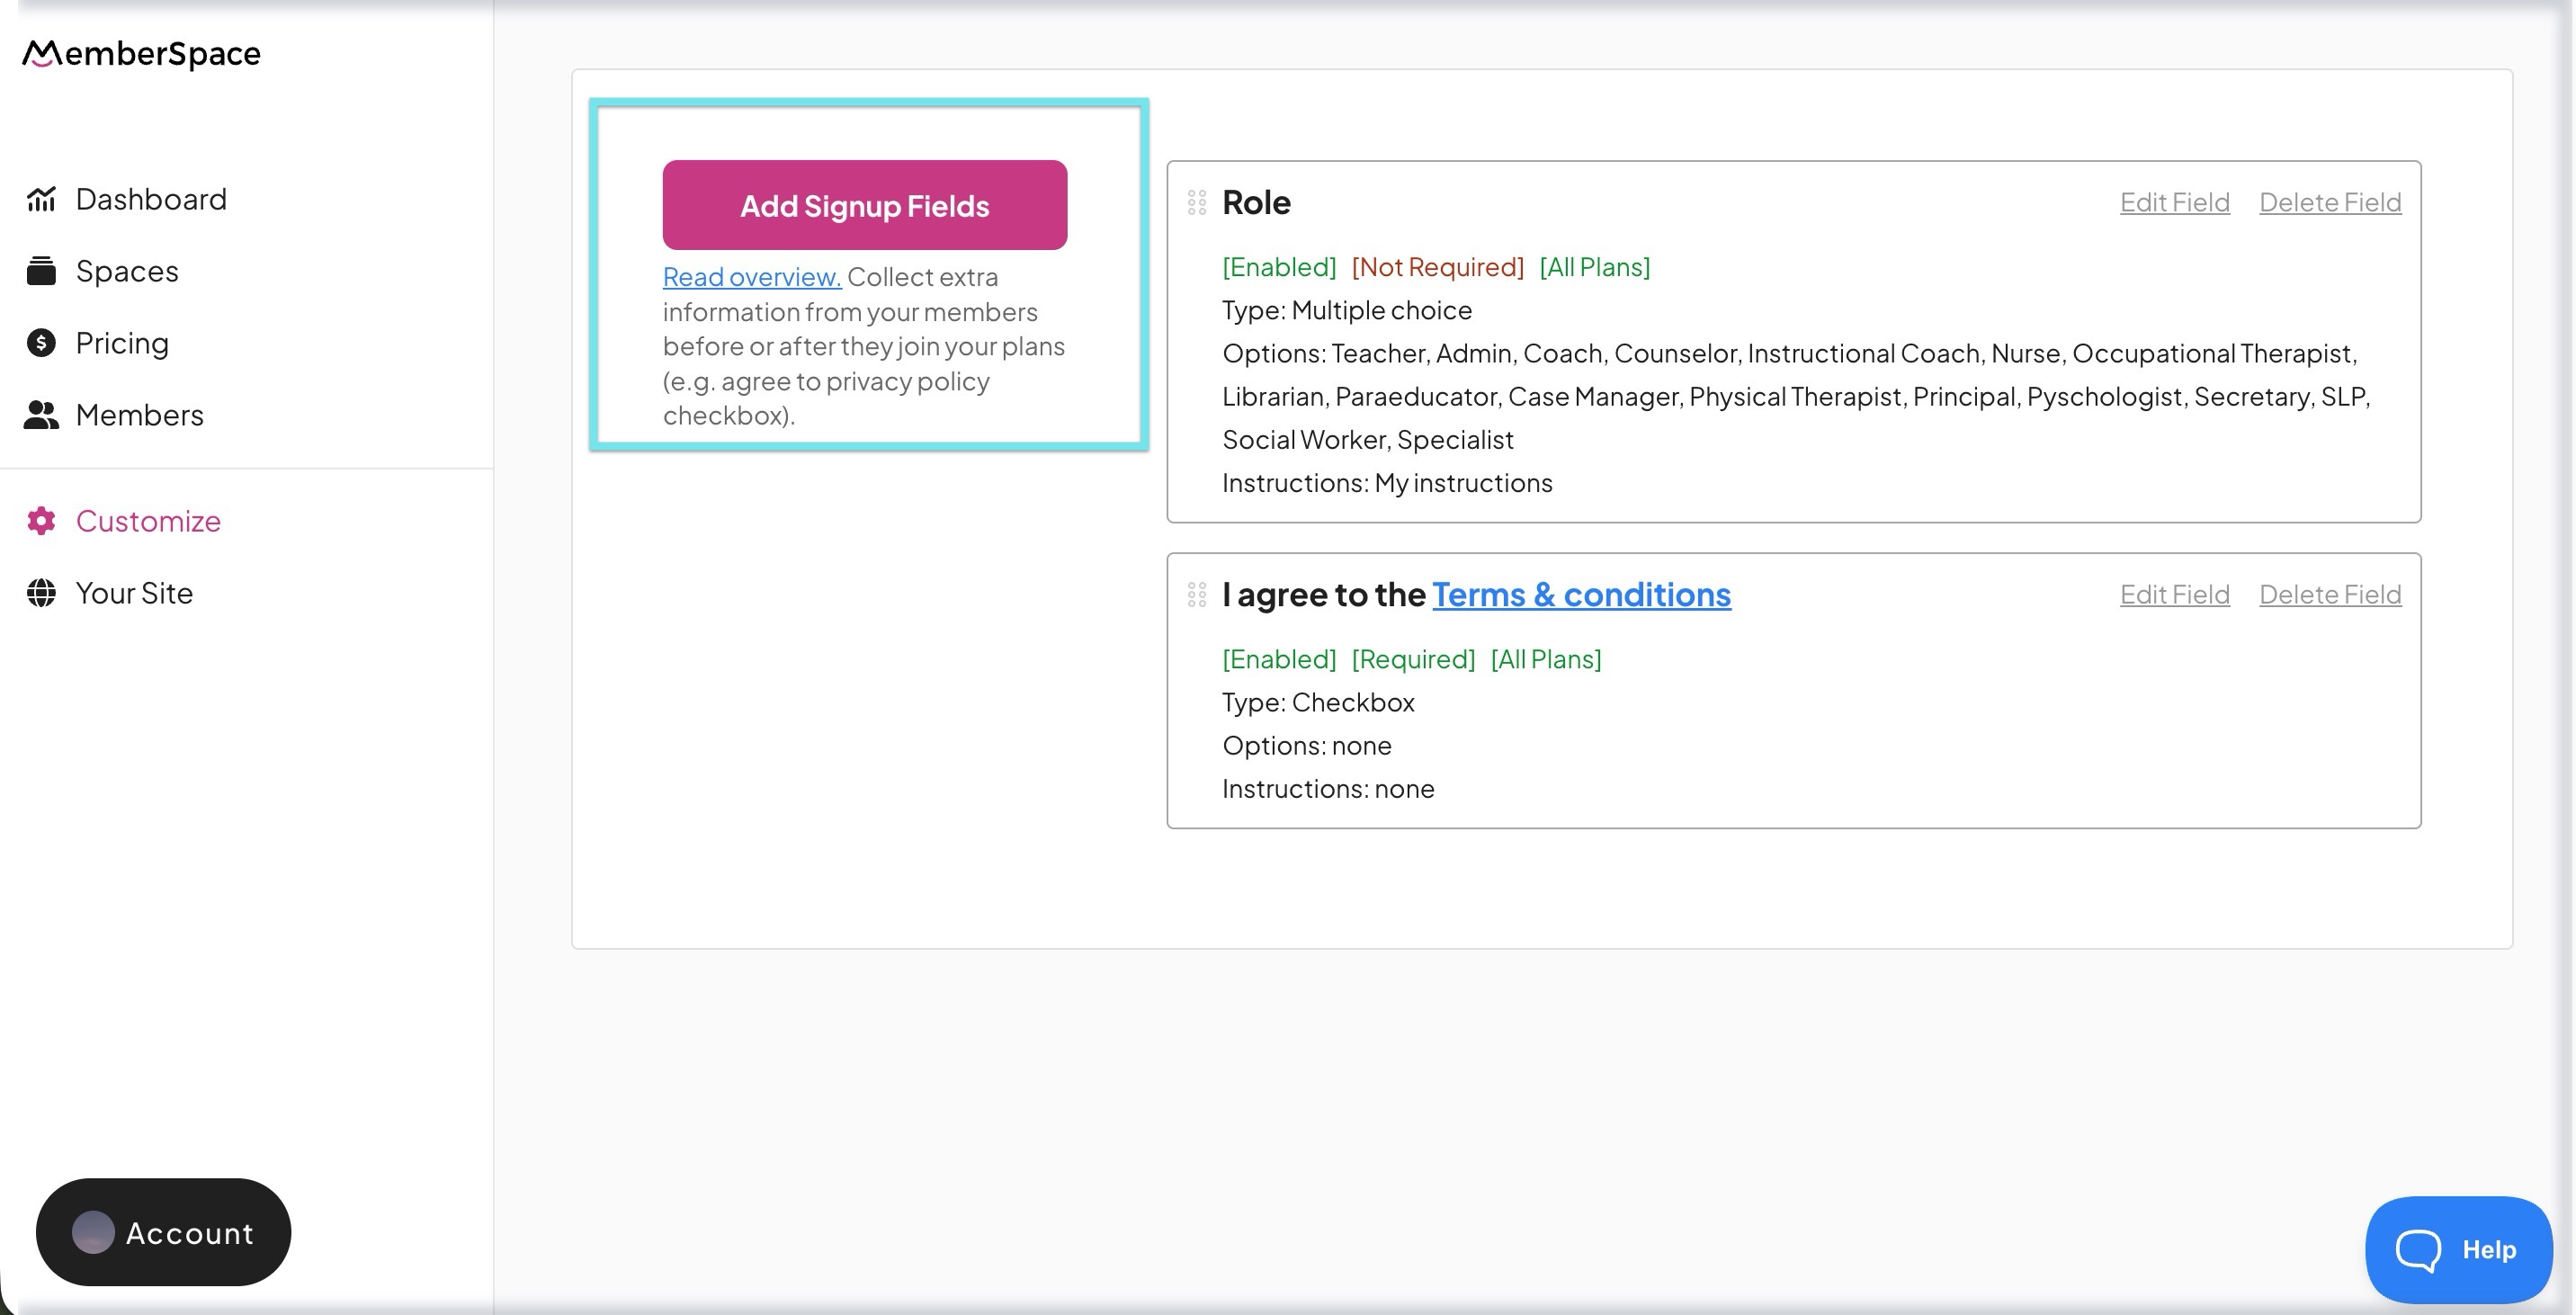
Go to your MemberSpace dashboard > click on Customize > click on Signup Fields > click Add Signup Fields:
-
Select Checkbox as the Type of signup field. For the display name, enter something like "Please add me to your monthly newsletter" and make sure you toggle off Require field during signup:
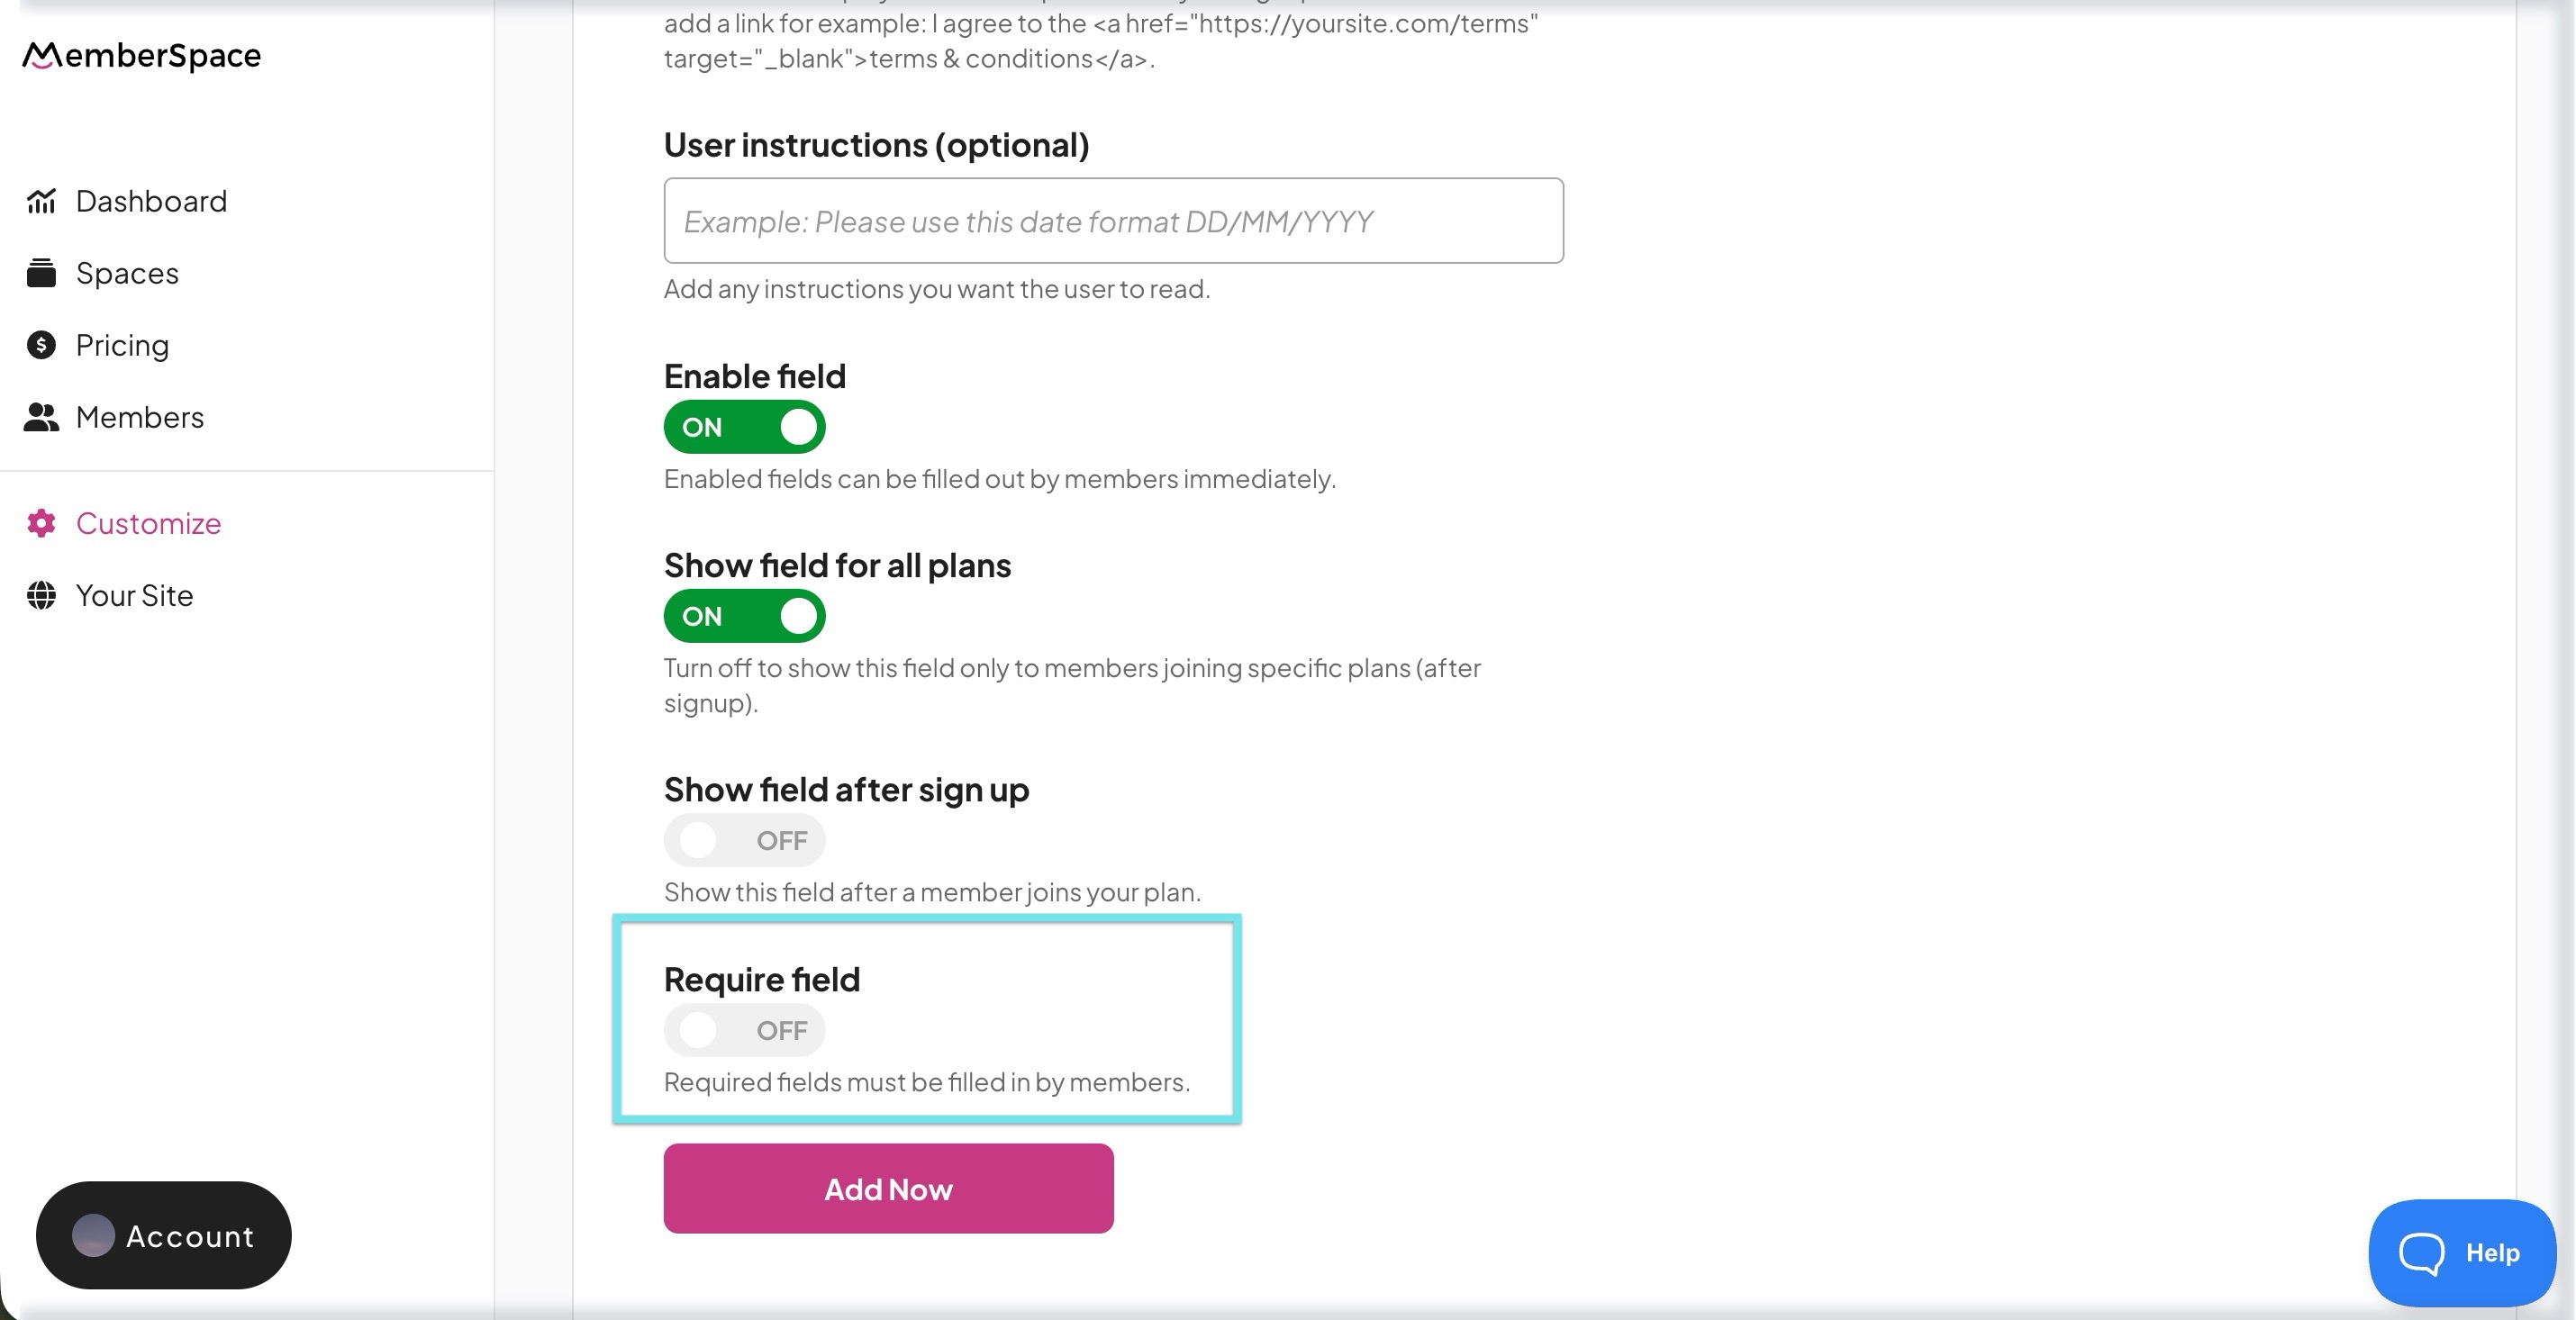
Then, click Add Now at the bottom of the form when you're done.
-
Now, whenever someone signs up as a member, they will have the option to provide their consent to be added to your mailing list by selecting the checkbox:

Remember, the checkbox can not be required (as per GDPR) as this must be a voluntary action.
-
Go to your Zapier dashboard > click Create Zap to create a Zap > search for MemberSpace:

-
Select New Membership > click Continue > connect your MemberSpace account > choose your website > click Allow Access:

Then click Continue:

-
Choose which plans you want this Zap to apply for. We selected All Plans in the example below, but you can choose just specific plans if you want. Then click Continue:

-
You'll then need to click Test trigger to test the connection in Zapier:

After the test runs, click Continue.
-
Move to the next step and select Filter:

-
Click the dropdown under Only continue if > click the text for the custom signup field checkbox you created previously. For the Choose condition dropdown, select (Boolean) is true > click Continue:

-
Zapier will then tell you if the Zap (based on the sample user from testing in Step 8) would have been stopped at this step (i.e. the user did NOT consent to get added to your email list):

Click Continue at the bottom.
-
Move to the next step and search for Mailchimp > for the action event, select Add/Update Subscriber > then click Continue:

-
Add your Mailchimp account and click Continue:

-
Fill in the two required fields at the top:

You can choose to fill in any optional fields (e.g. Groups or Tags) if you want or just leave them blank.
If you have any other required fields within your Mailchimp audience (e.g. First Name), you'll need to fill those in as well and can use any member profile information such as their first name, last name, or custom signup fields:

Then click Continue at the bottom.
-
Next, click Test action to run a test of what was set up. This will actually add the member to your email list if they opted in. If you don't want that to happen, click Skip test:

-
Now, turn your Zap on if you're ready for the entire workflow to start automatically running:

And you're done! Now, whenever a member joins a plan on your website, they will have the option to opt into your email list and then this Zap will automatically add them to Mailchimp for you.


