How to install MemberSpace on Duda
You'll need to be subscribed to the Duda Team plan or higher to install MemberSpace.
Step 1: Copy Your MemberSpace Install Code
- Log in to your MemberSpace dashboard.
- Navigate to Customize > Integrations > Duda.
-
Click Copy above your install code.
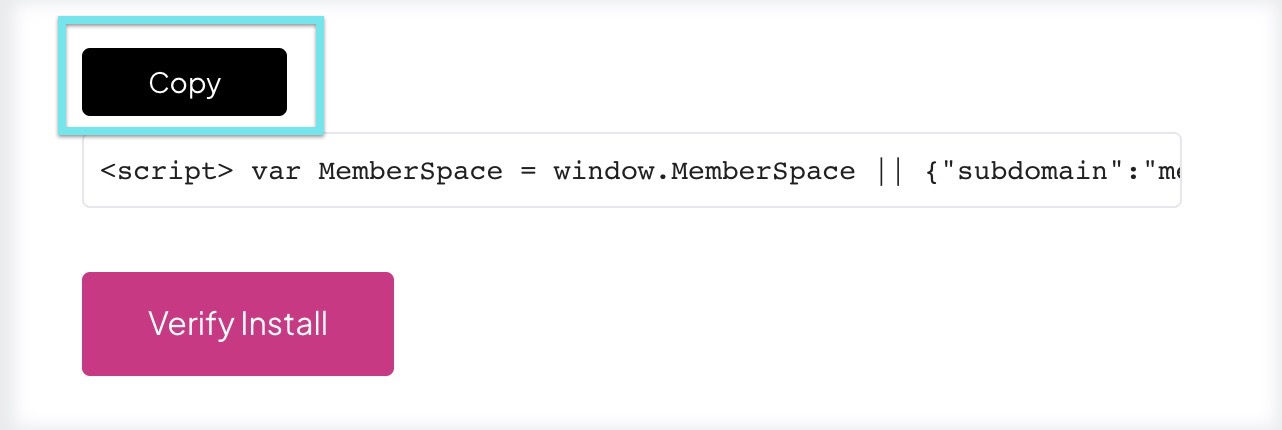

If you’re an agency setting up a site for a client, or reinstalling MemberSpace on a previously connected site, you can find the install code in the same place.
Step 2: Add the Code to Your Duda Site
- Log in to your Duda site.
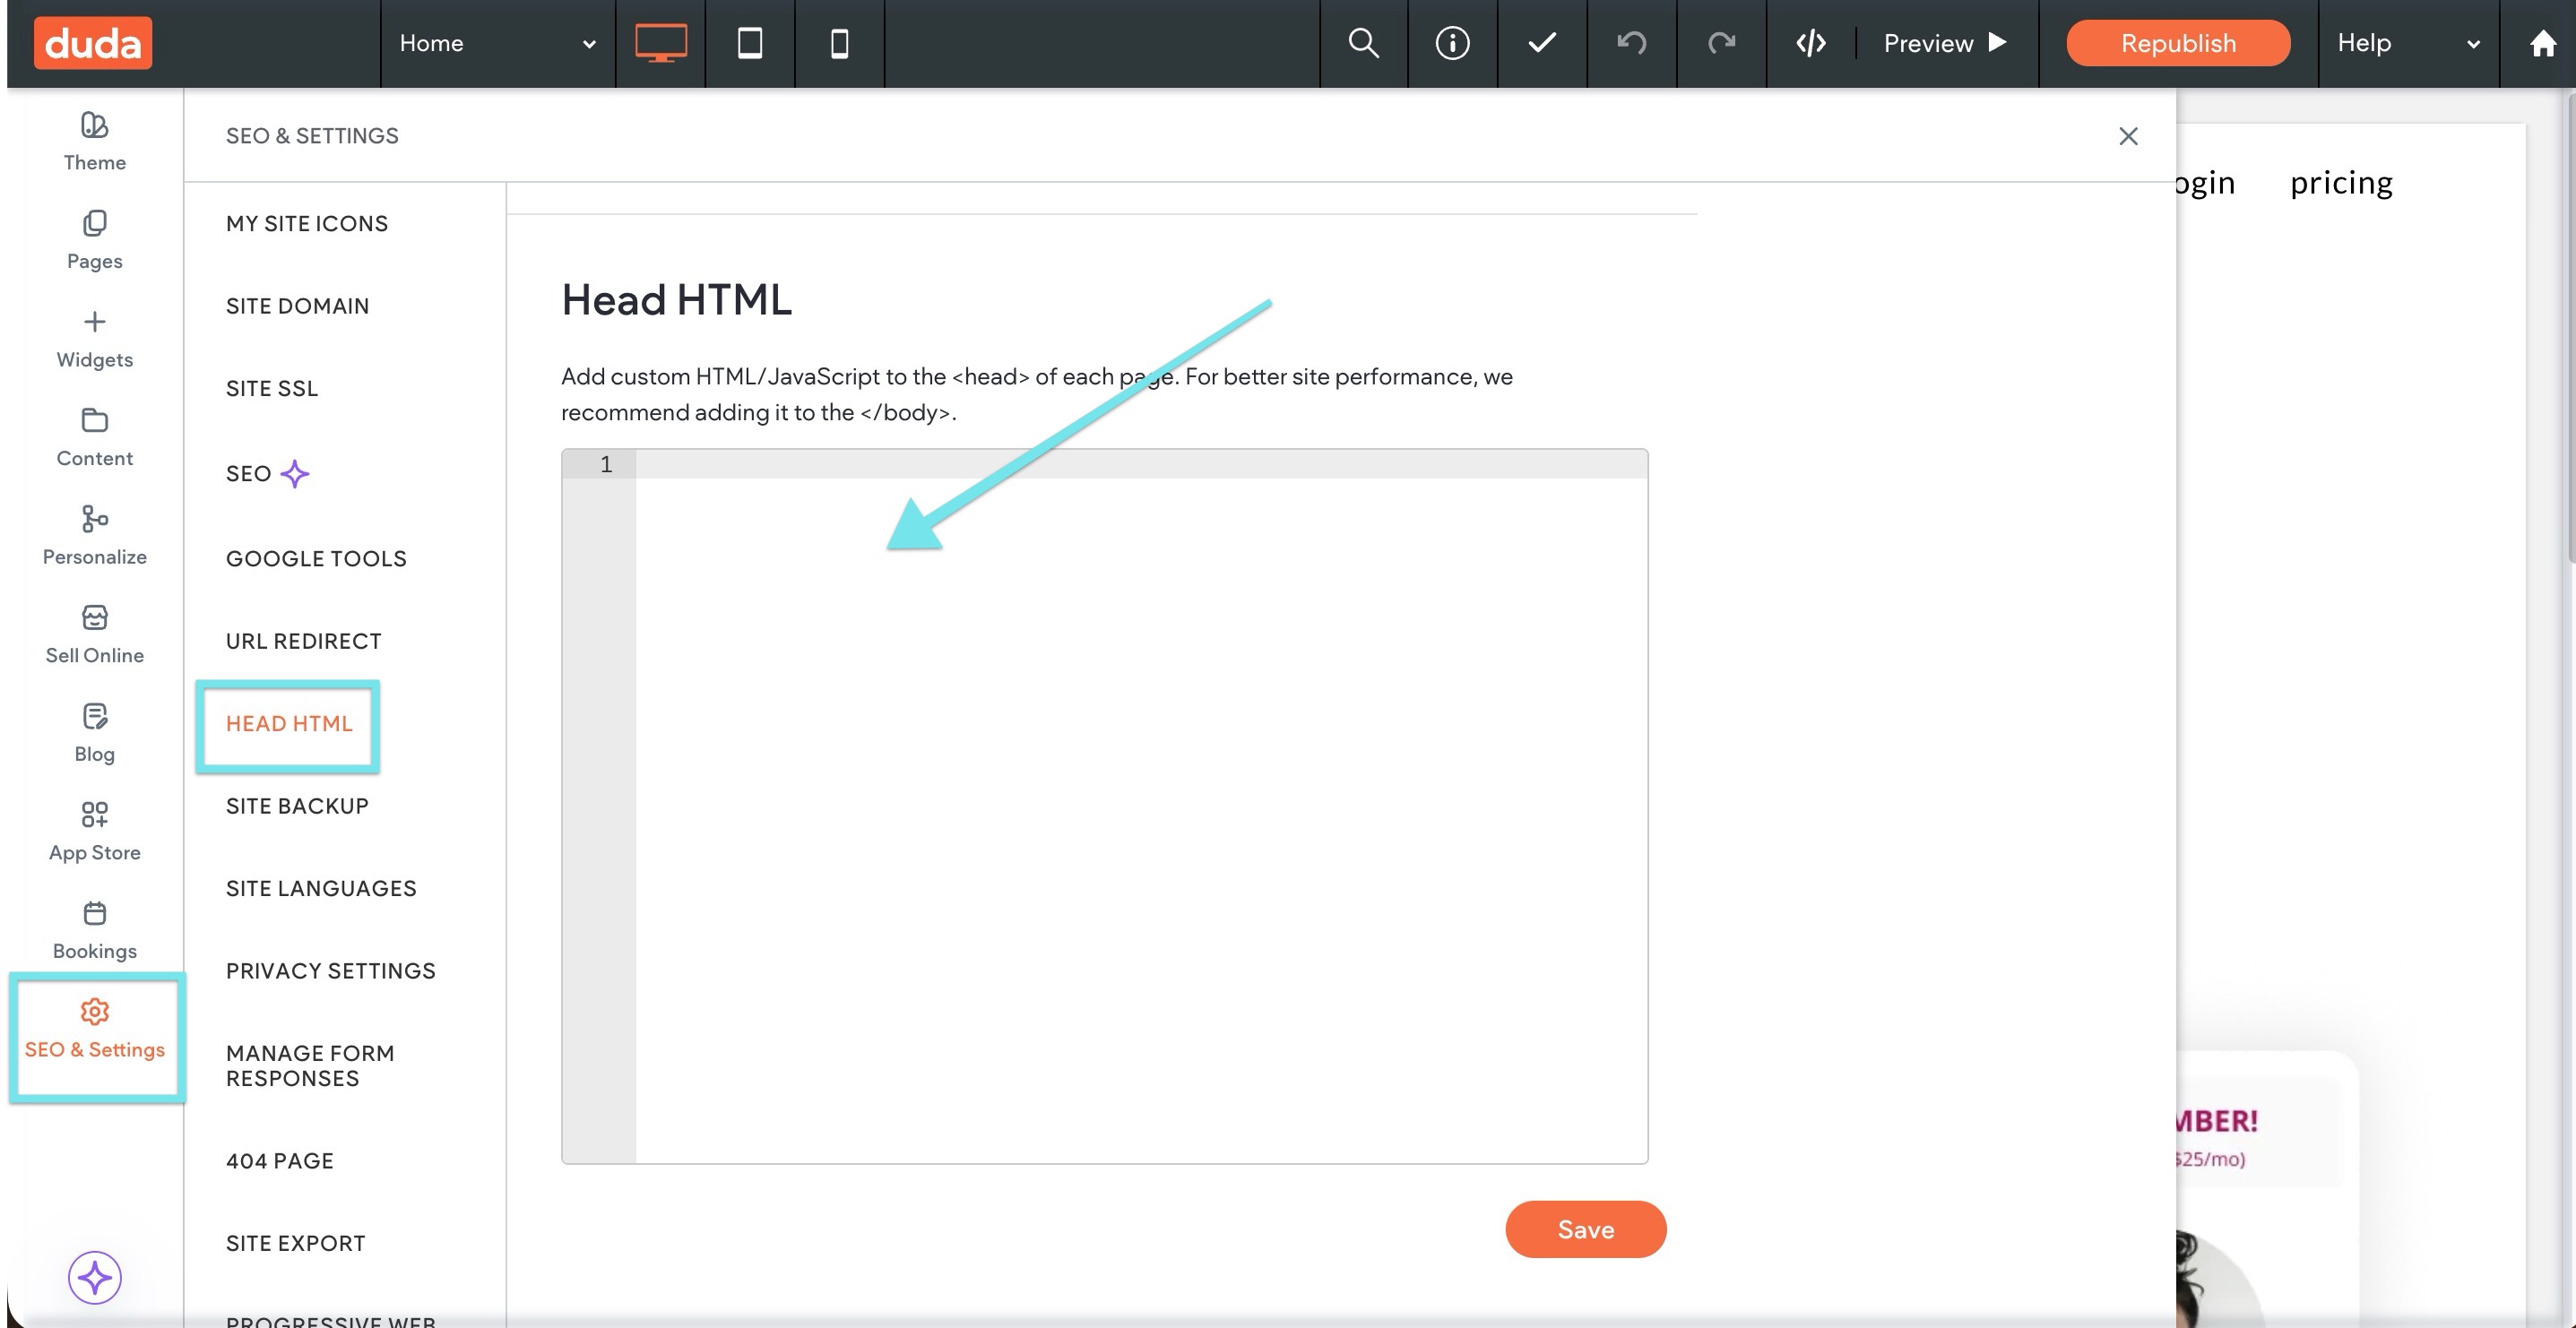
- In your Duda backend, click SEO & Settings in the left side menu
- Click on HEAD HTML > paste the code you copied previously > then click Save:
-
Publish your changes in the top right.

Step 3: Test Your Installation
- Visit your live website (not the Duda editor) to confirm everything is working.
Once installed, your MemberSpace Button will automatically appear in the bottom-right corner of every page.
You can customize or disable this button anytime from your MemberSpace settings.
After successfully installing MemberSpace:
- Visitors can join your plans and access your members-only content.
- You can manage access, billing, and design options directly from your MemberSpace account.
Step 4: Verify the Installation
- Return to your MemberSpace dashboard.
- Click Verify Install.
If installation is successful, you’ll see a green “Successfully Installed” message next to the Verify button.

If you see “Not installed yet,” double-check that you copied the full code and pasted it into the Header section in Squarespace.