How to customize wording your members see
Customize the wording members see
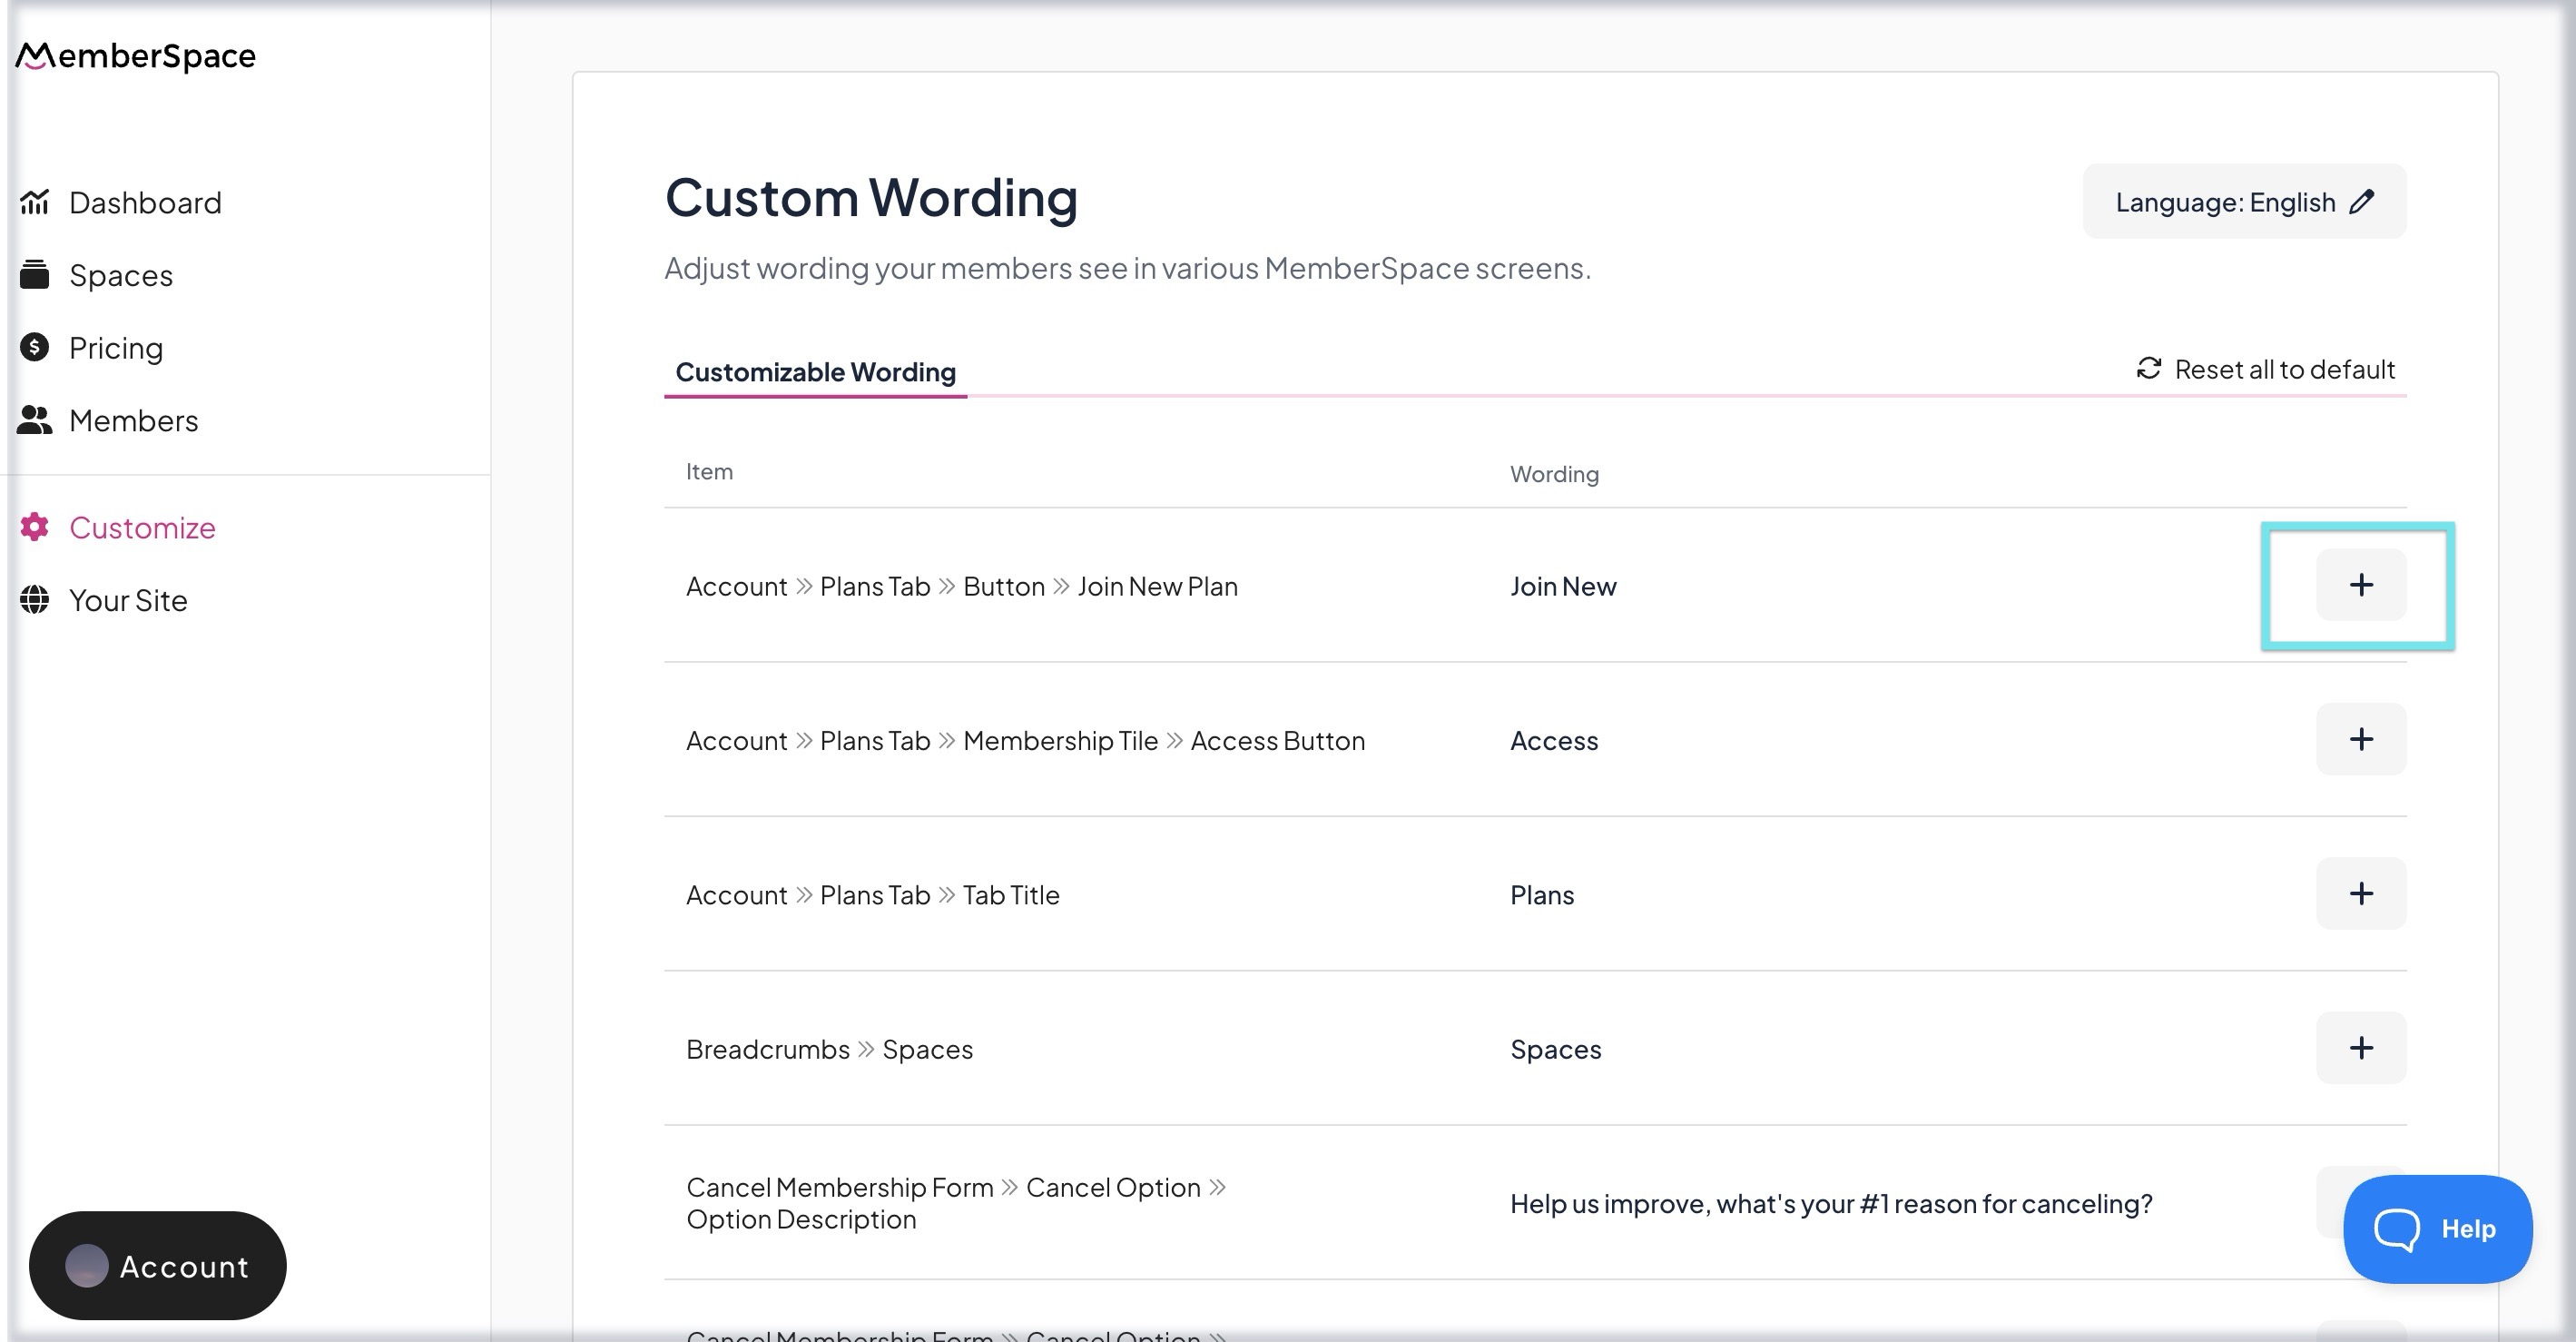
- In MemberSpace, click Customize in the left navigation > Custom Wording
-
Click the + to change any of the default options under Customizable Wording:
-
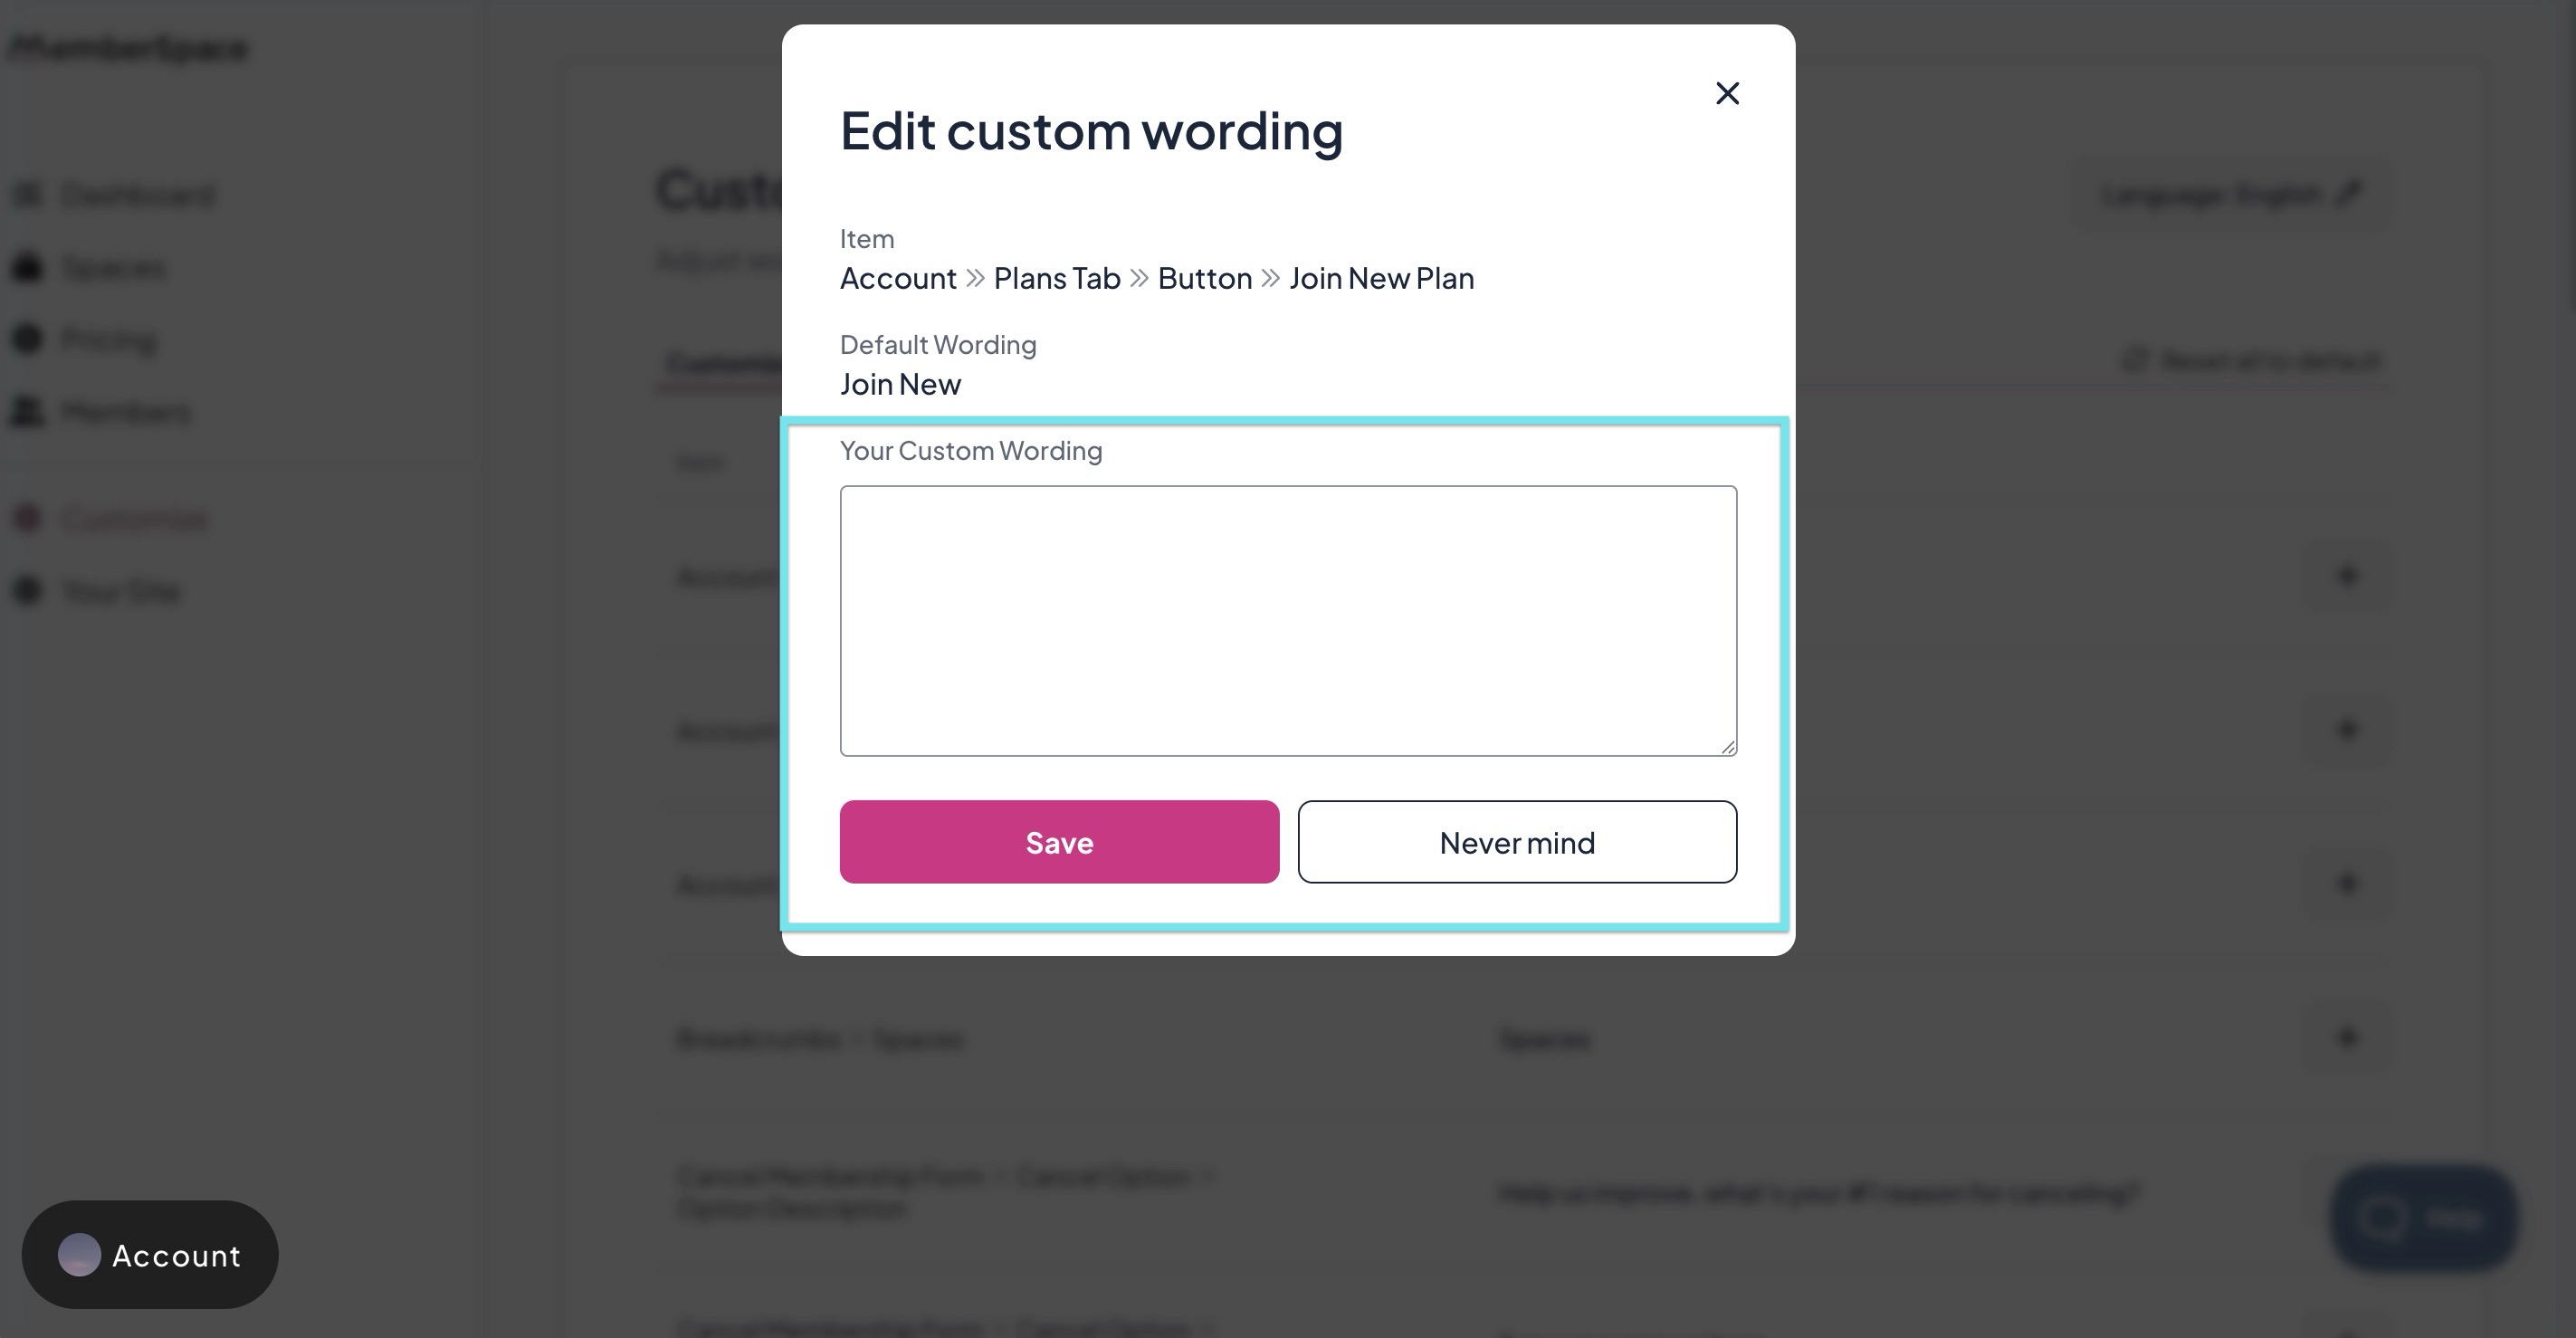
Add your new text and click Save:


Language translations
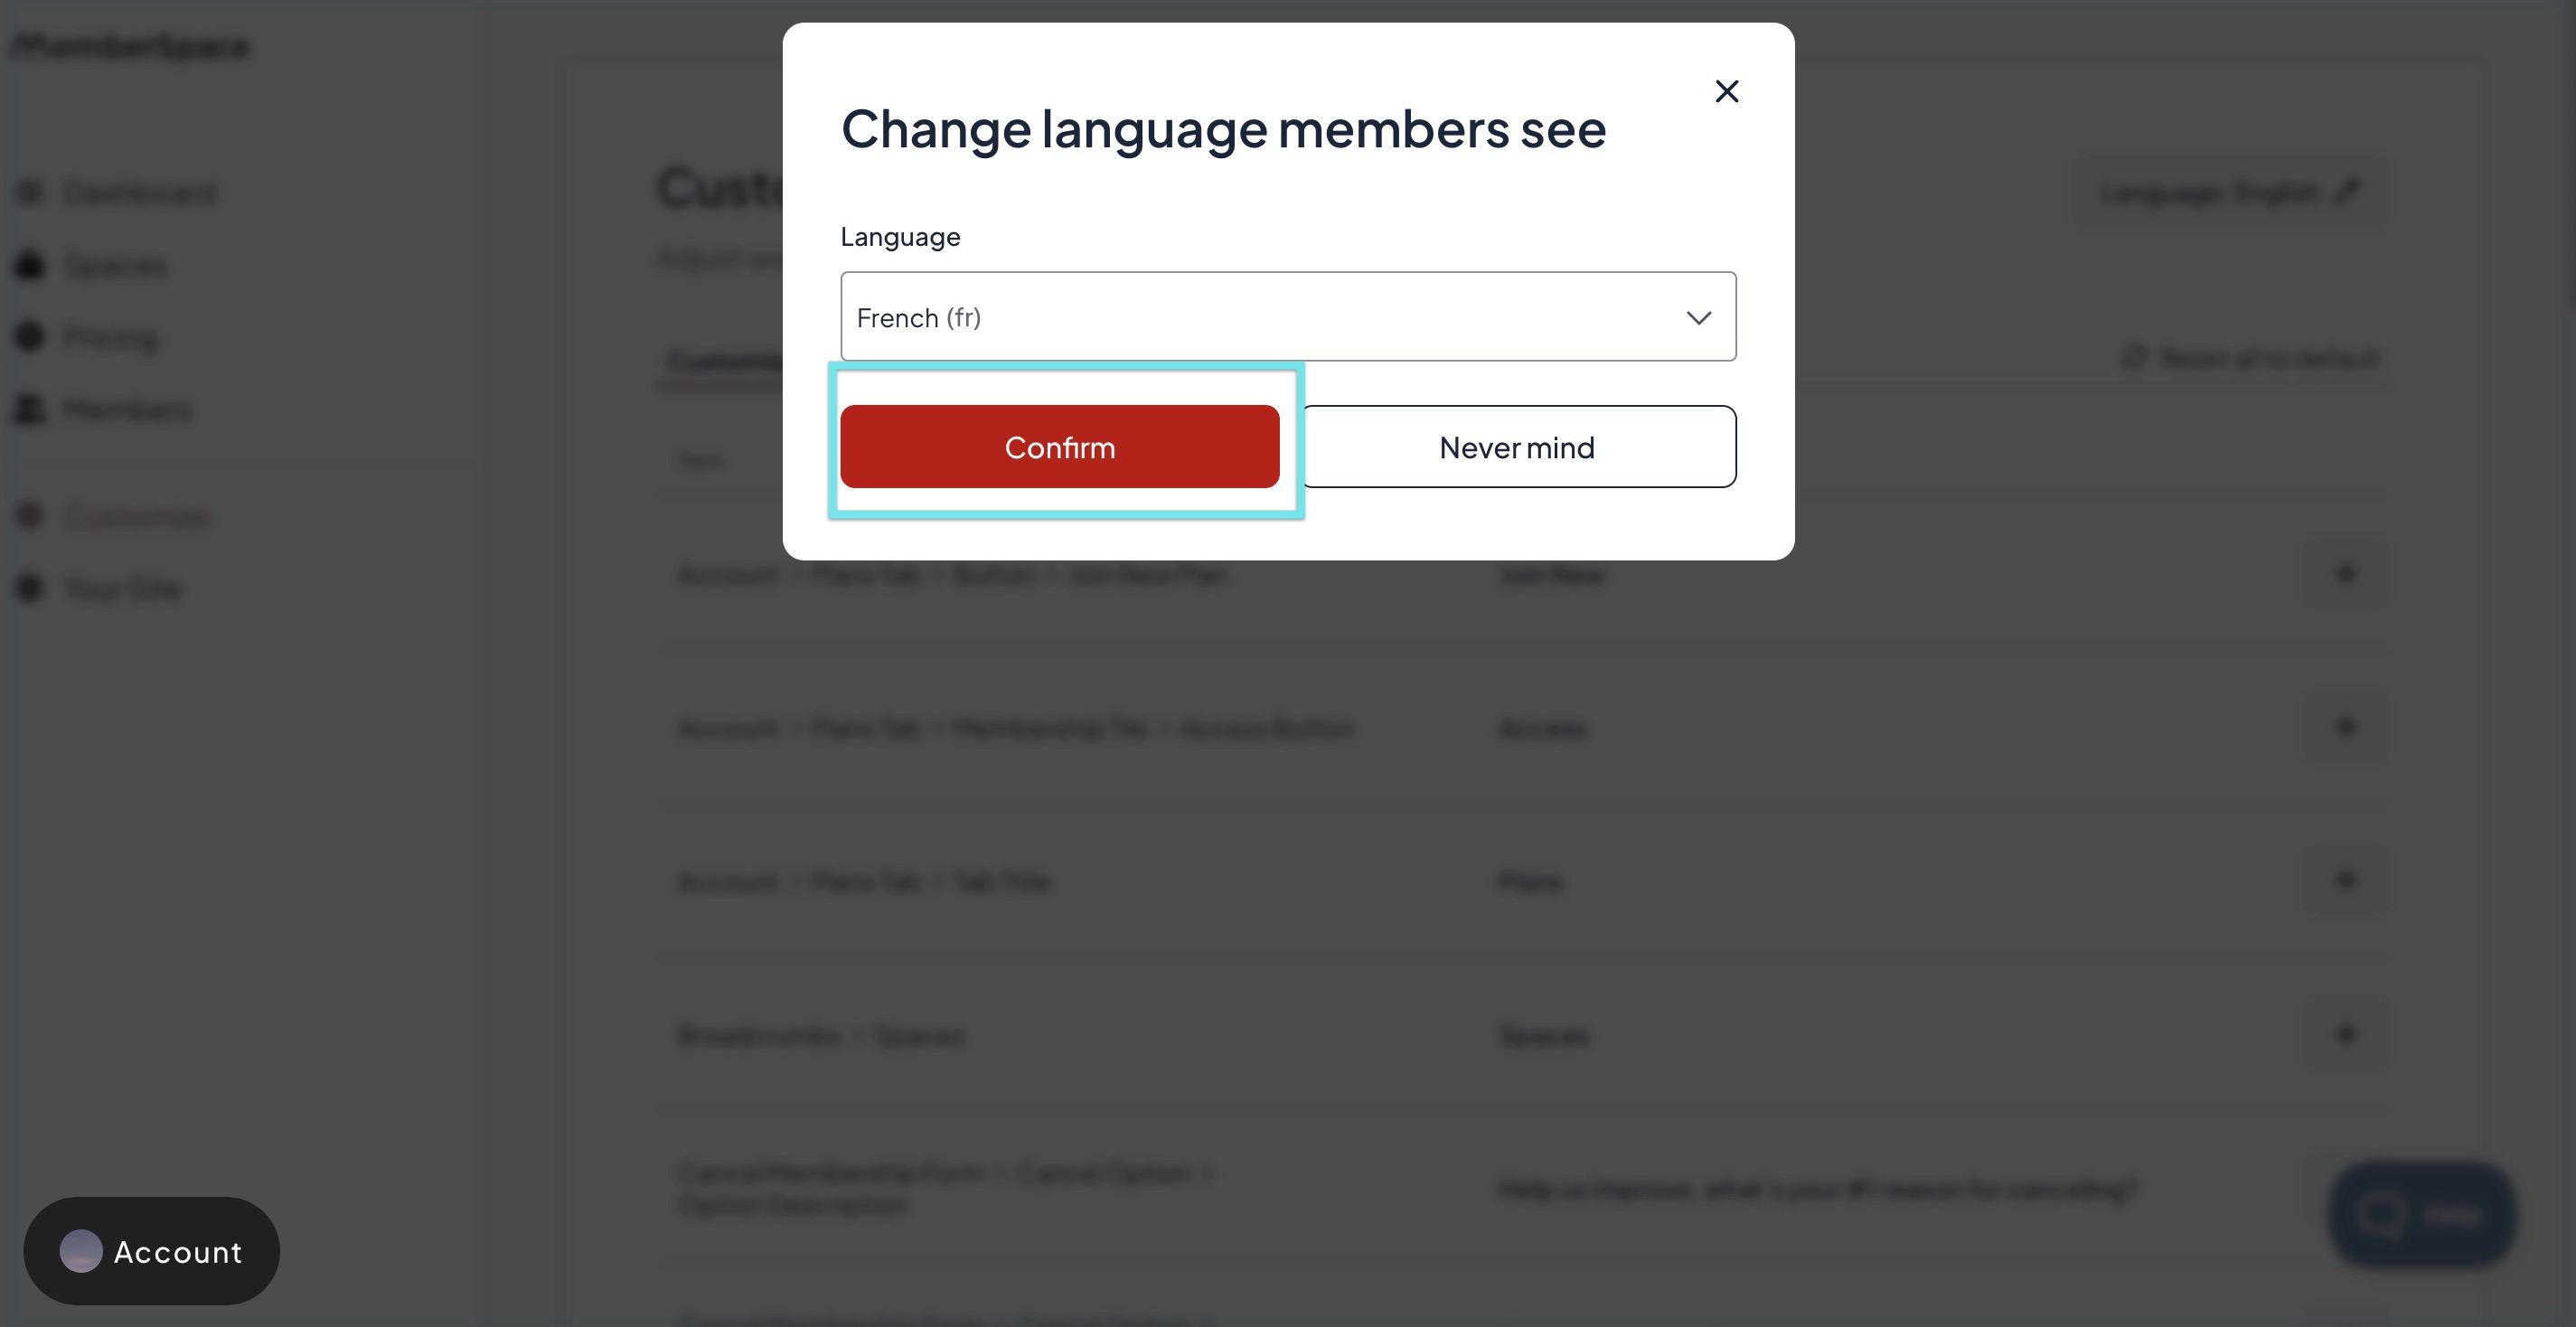
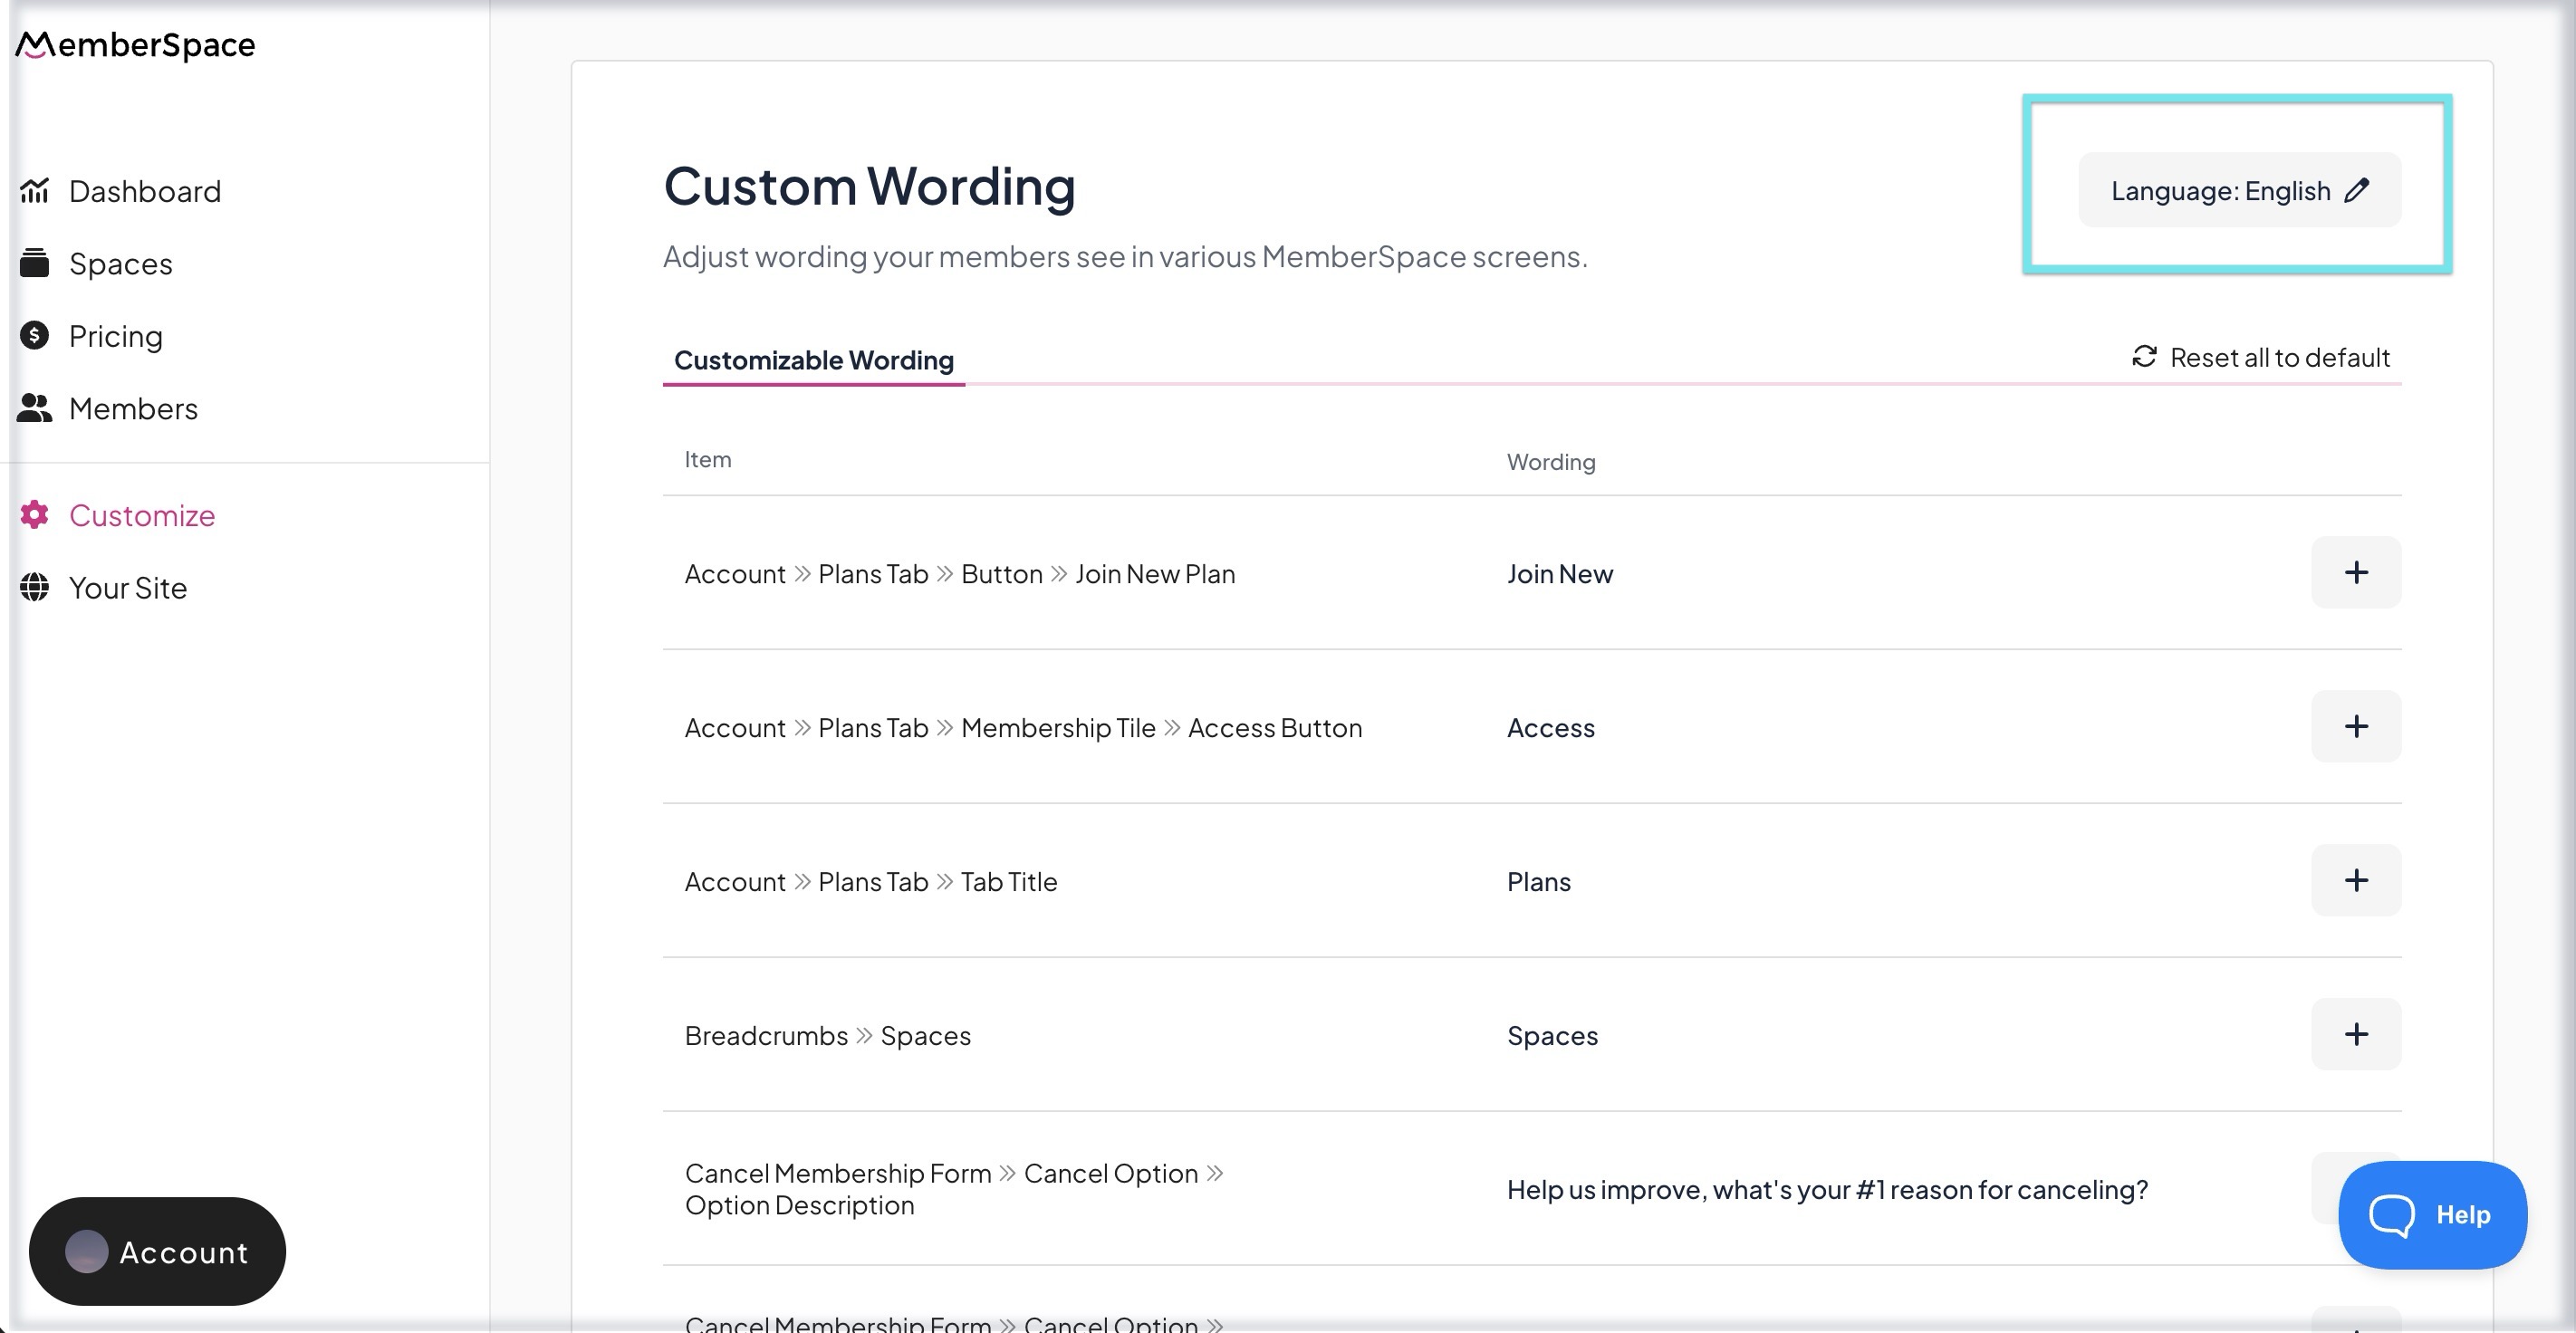
You can easily change all of the English words your members see to another language. Go to Customize > Custom Wording > and edit Language in the top right:
Select a new language from the dropdown and click Confirm.