Adding members only content
You can add content for your members in a variety of ways—locked pages, links, posts, file uploads, and videos. Members can search through content, bookmark their favorites, get notified when new content is published, react and comment.
Try it yourself — use the walkthrough demo to see how to add members only content. Written instructions are also available below.
| Add a new space | Add Content to a Space |
| Edit Spaces and Content | Searching members content |
| Organize Your Spaces |
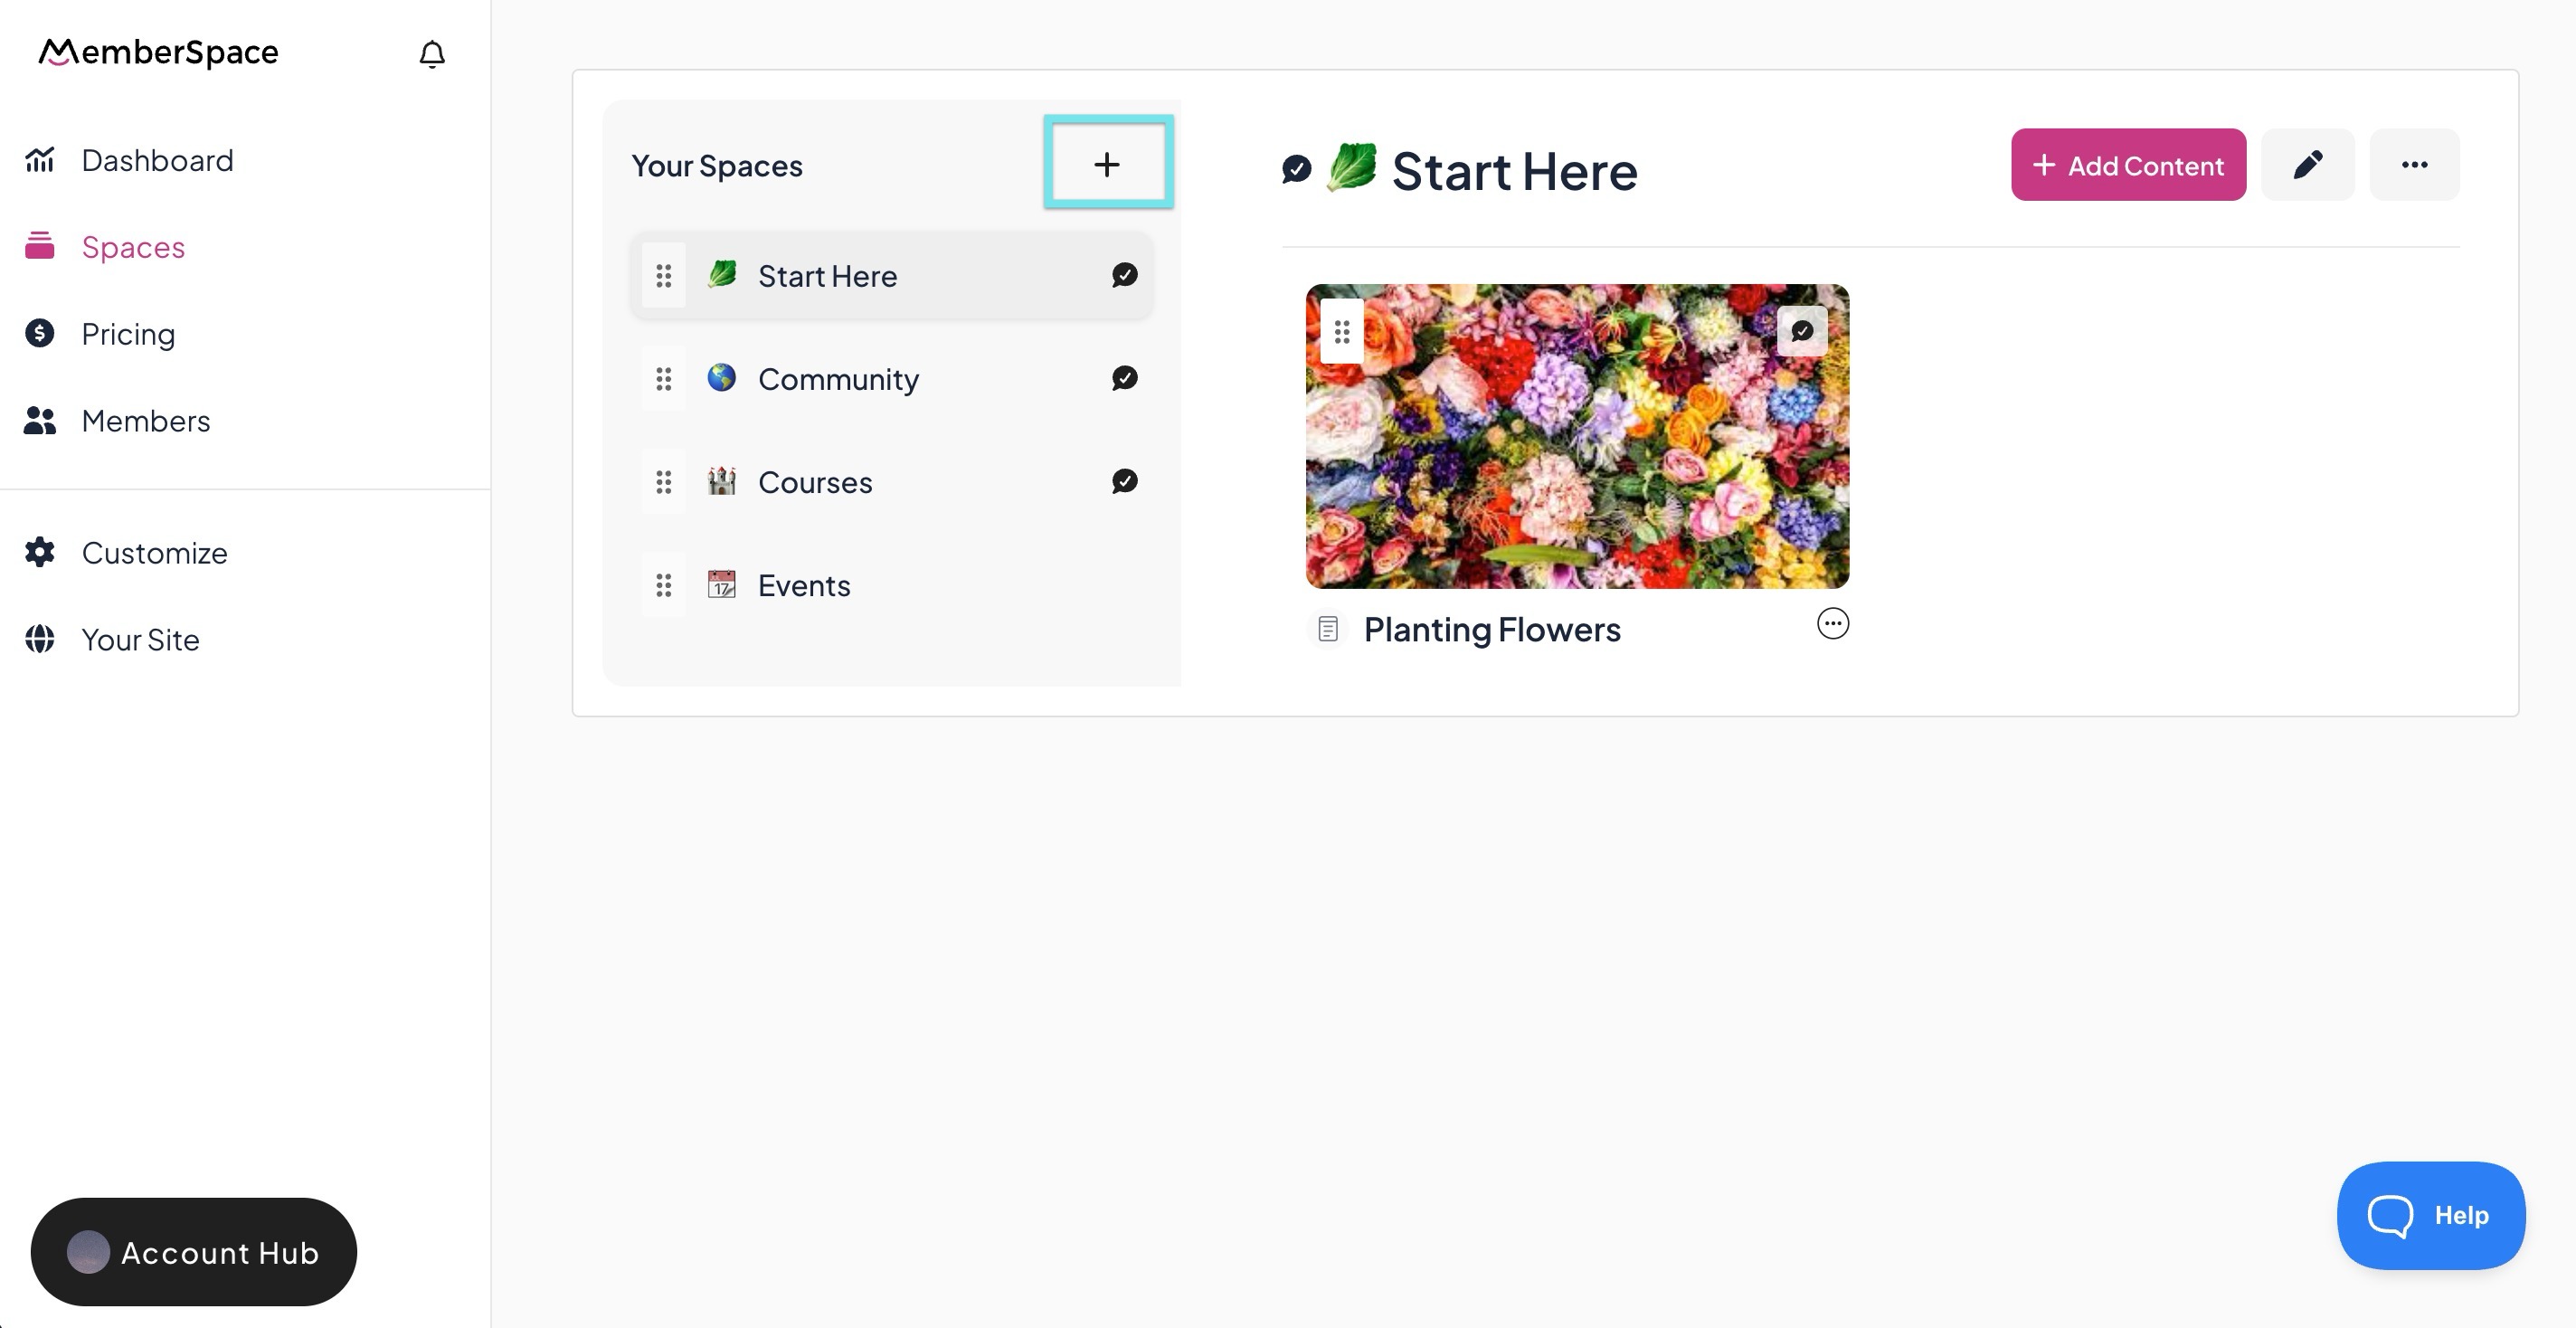
Add a new Space
Your Spaces hold the content your members can access on your website. You can create Spaces as needed to organize content and control access.
- In your MemberSpace dashboard, go to Spaces then click the + icon next to Your Spaces.
- Enter a title and select which plans grant access.
- By default, Spaces are visible to members. Toggle this off to keep it private.
- Toggle Notify Members on if you want members to see it in their What’s New feed.
-
Click Add Now.

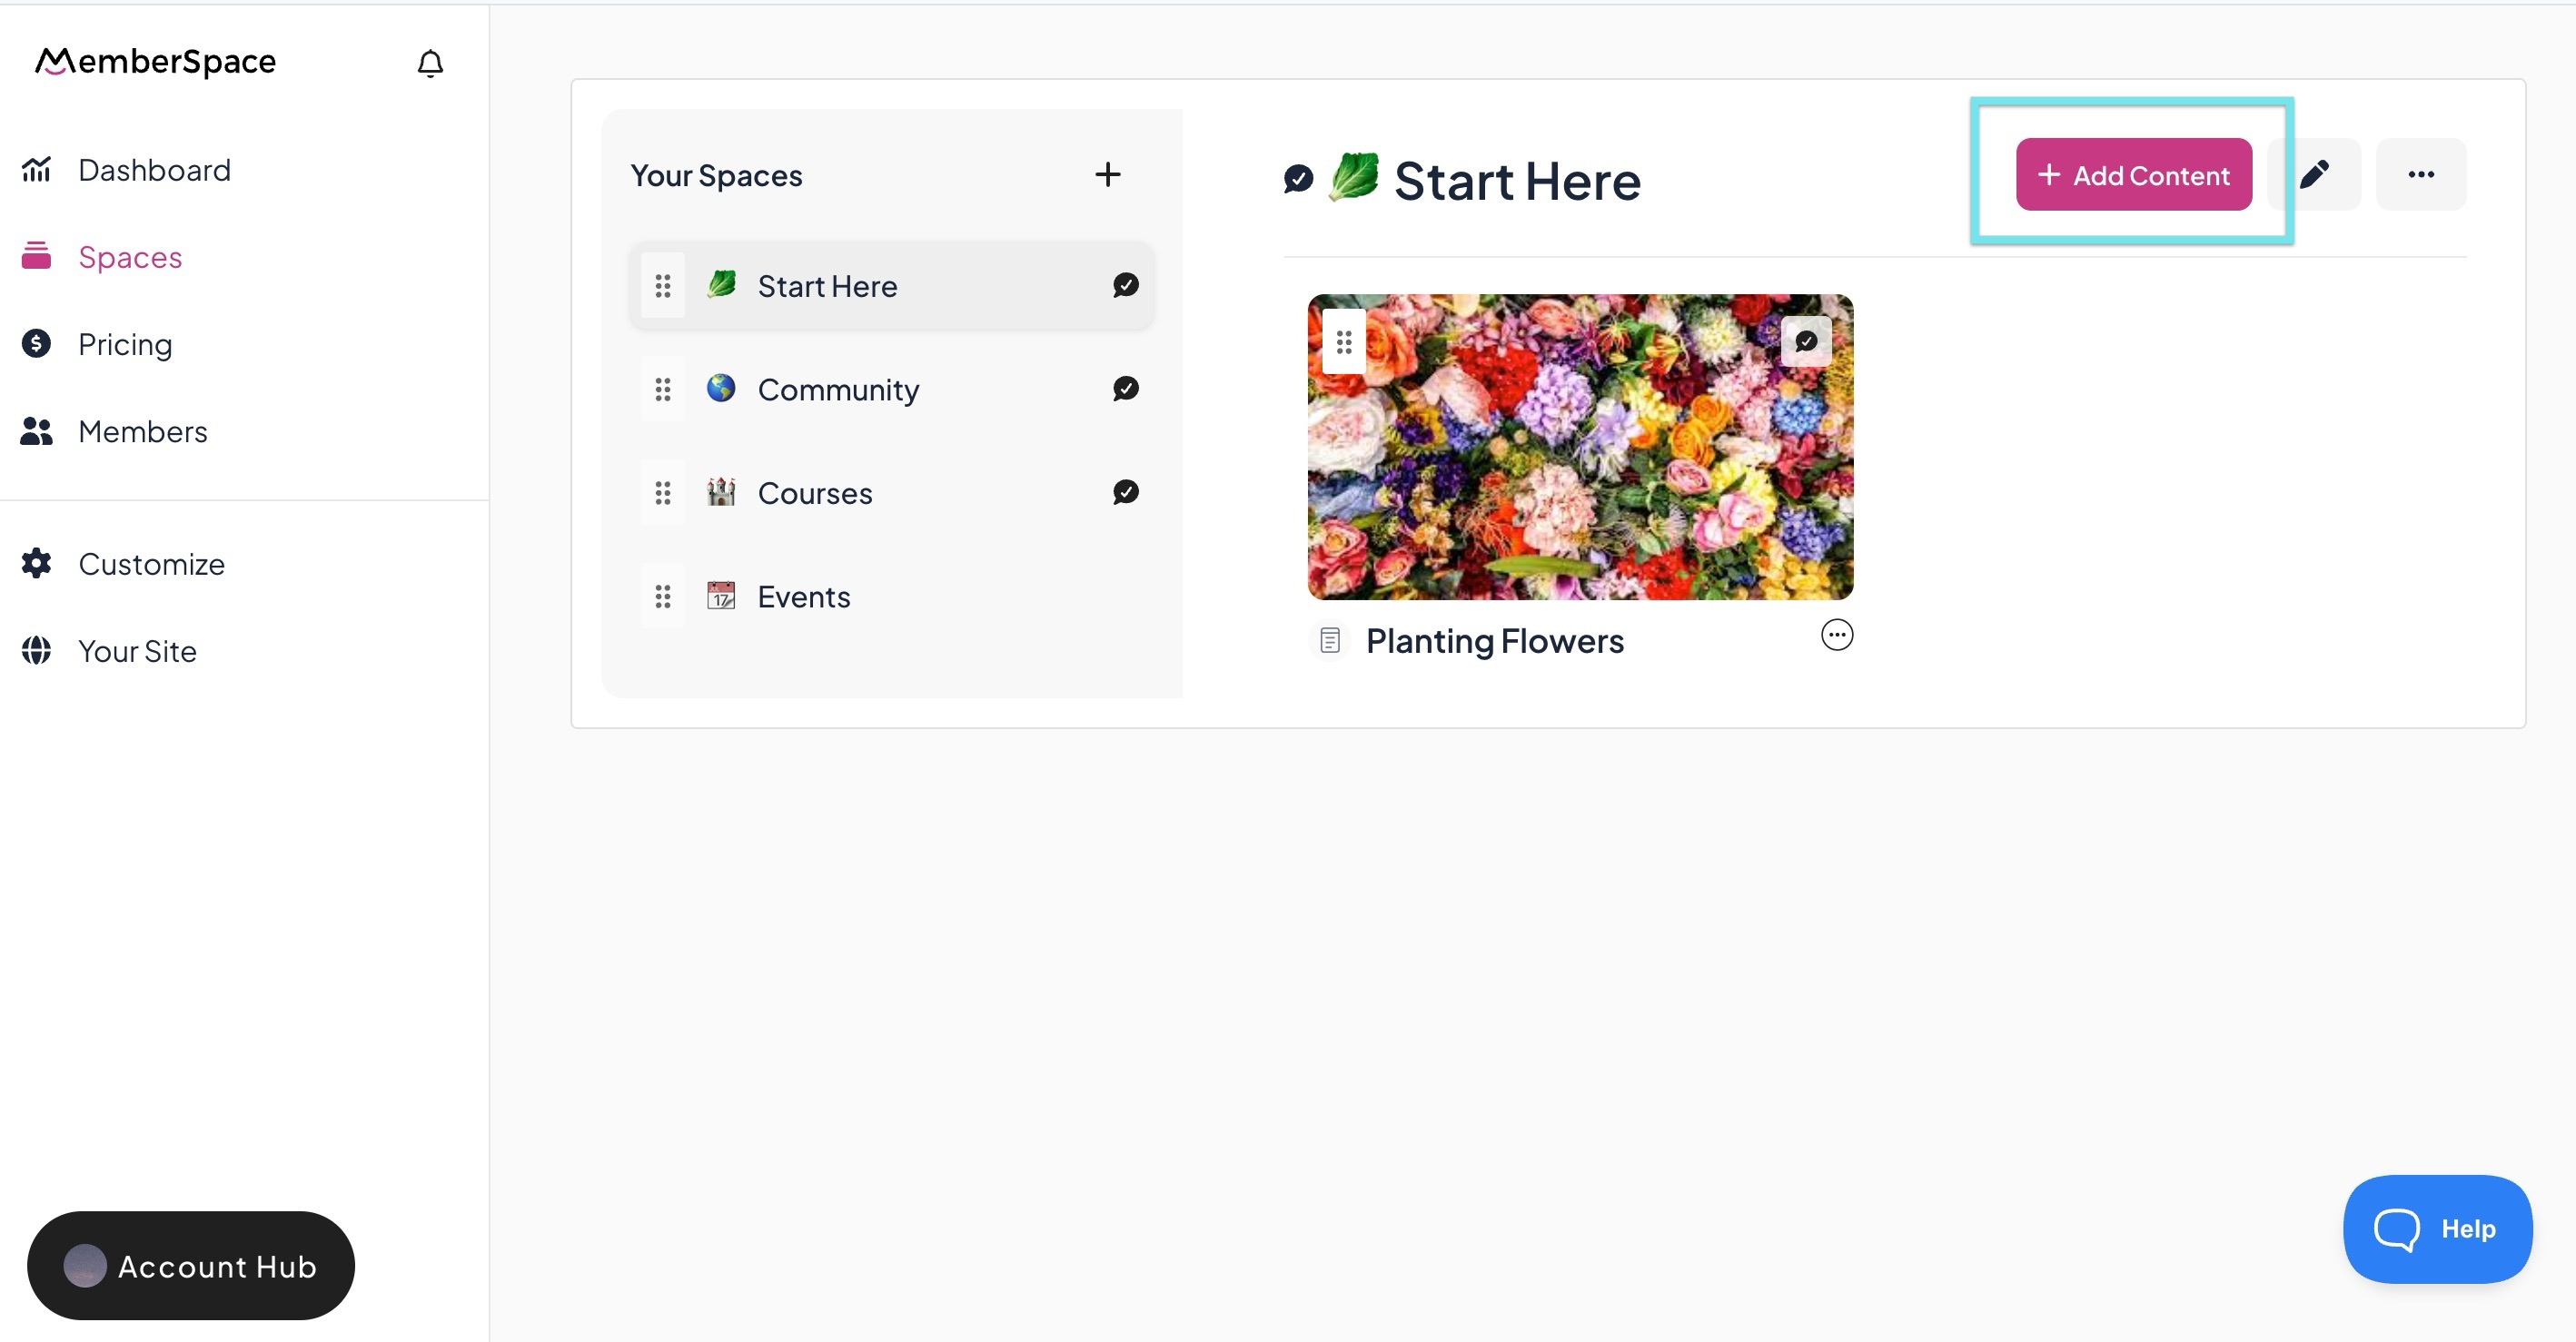
Add Content to a Space
- In your MemberSpace dashboard, go to Spaces and select the Space.
-
Click + Add Content in the top right.
-
You can add articles, files, links, videos, or locked pages on your website.
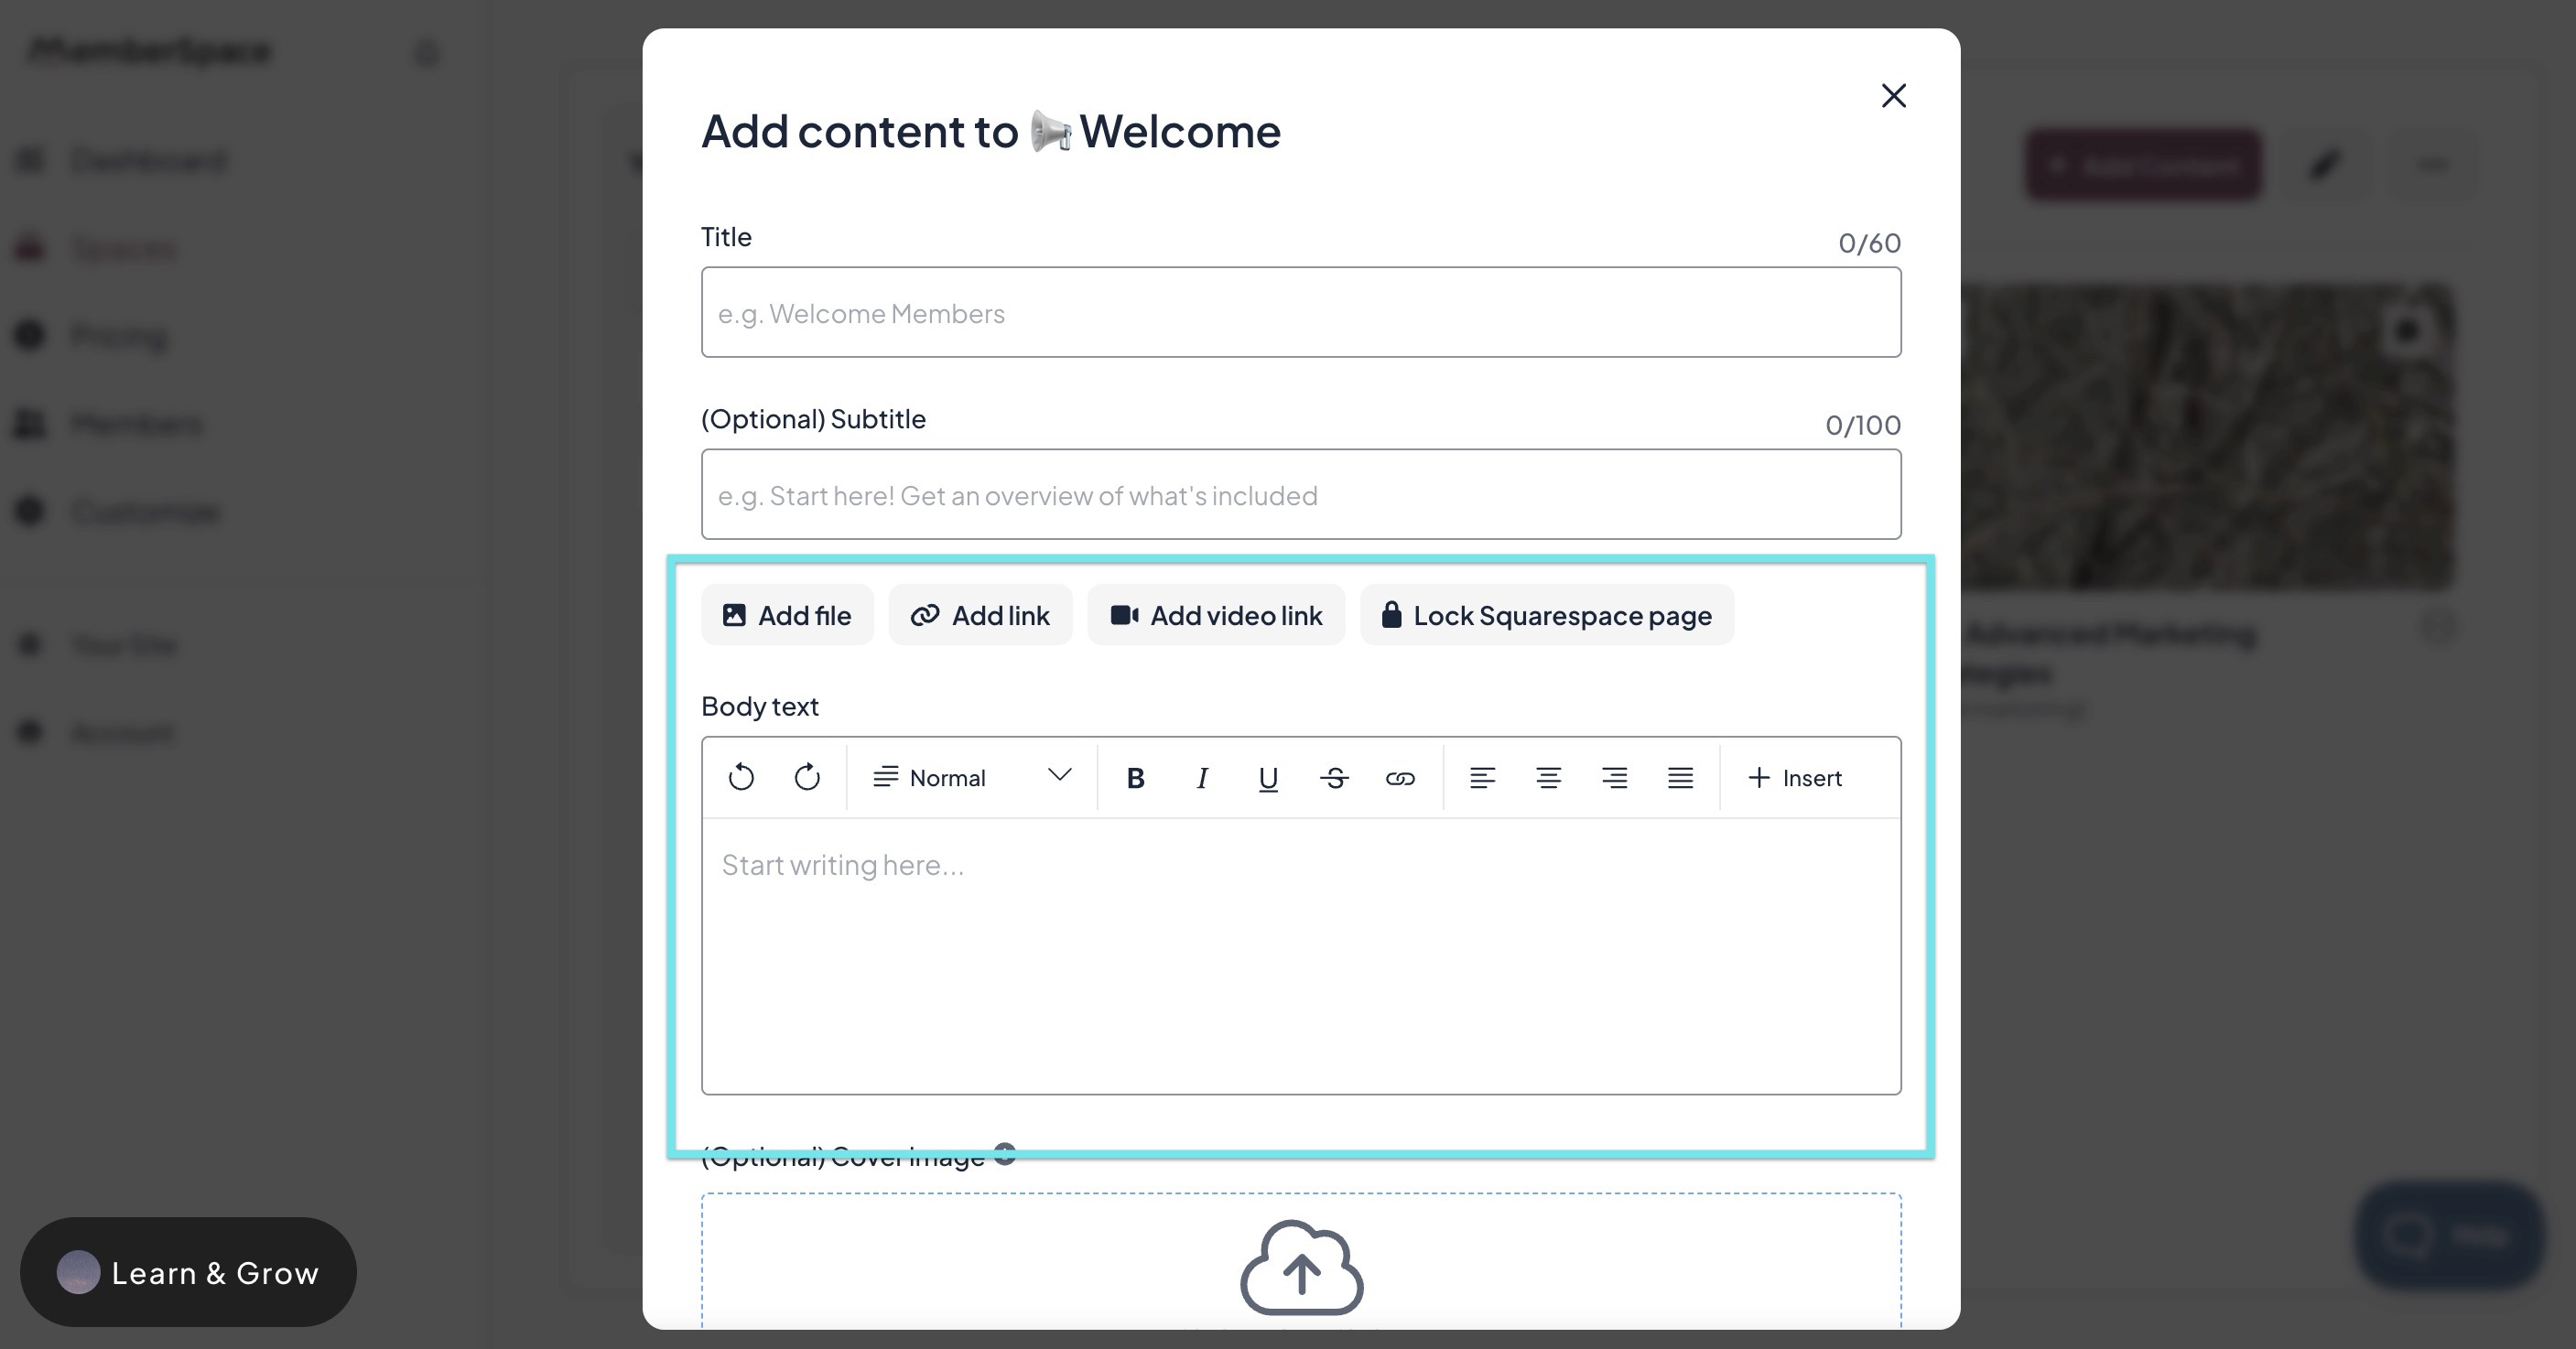
- By default, content is visible. Toggle this off to hide it.
- Toggle Notify Members on if you want members to see it in their What’s New feed.
-
Toggle Enable comments/reactions and allow your members to leave comments and reactions on this content item.
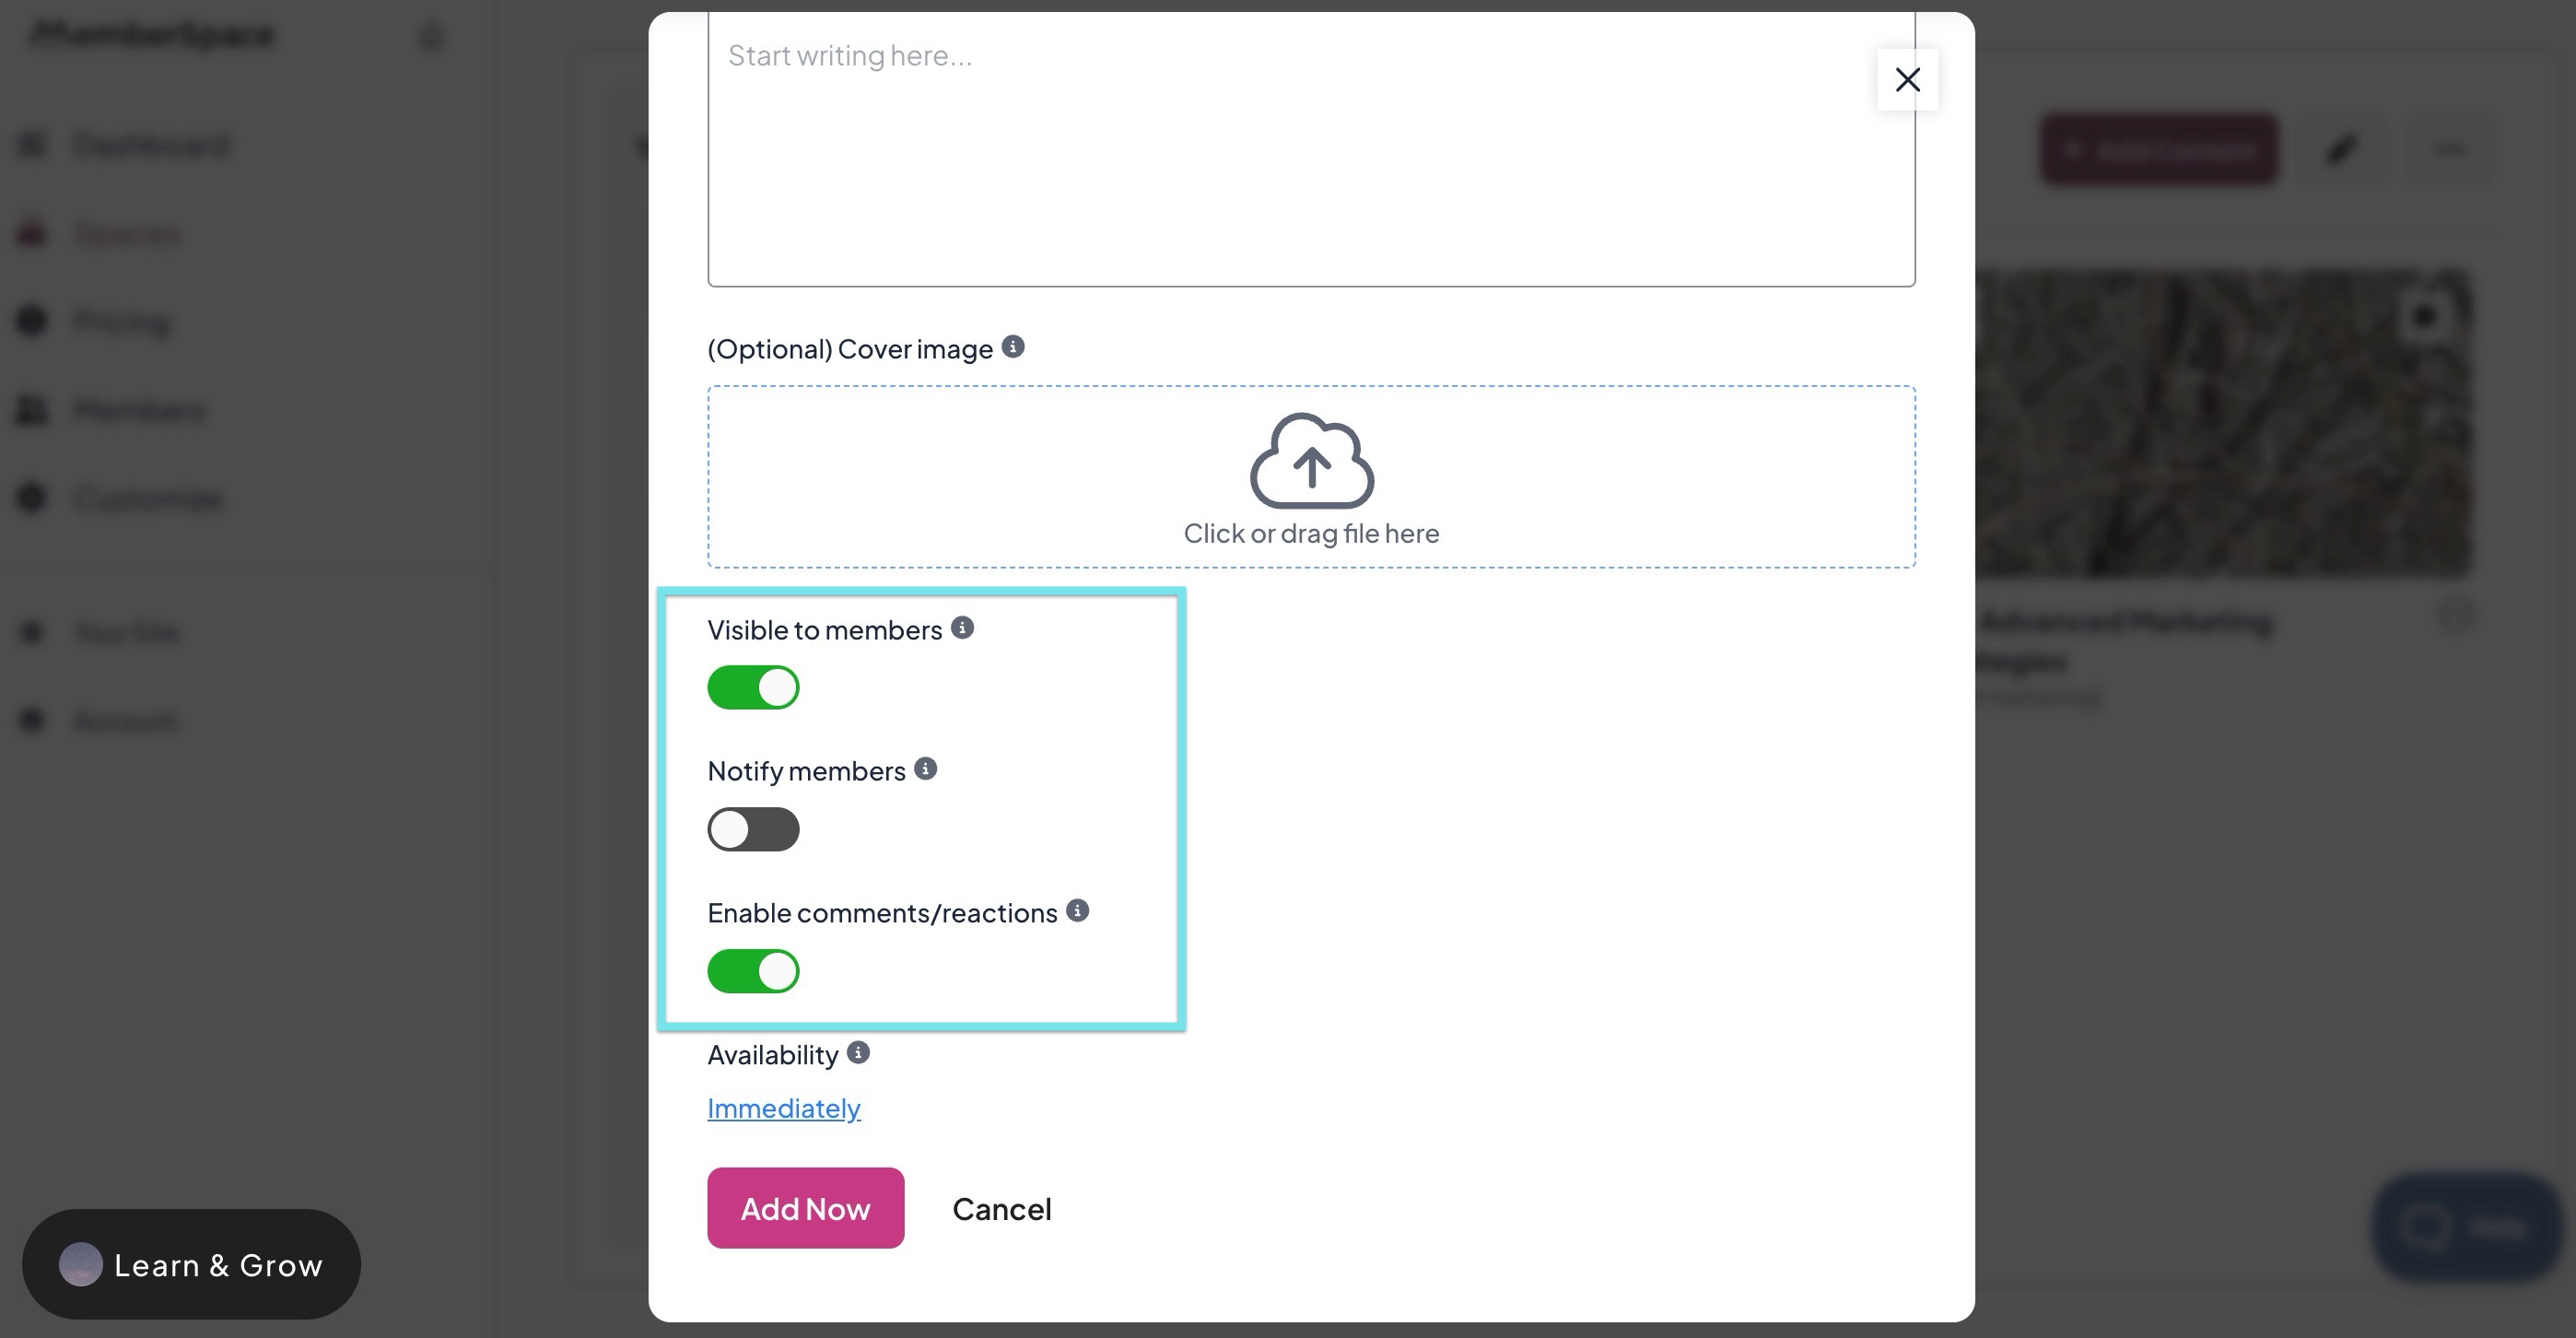
- Click Add Now.


Organize Your Spaces
- Drag and drop Spaces to change the order they appear to members.
- Within Spaces, you can add folders for better organization.
Add a Folder
- In your dashboard, go to Spaces > Select Space.
- Click the More Options (three dots) menu > Add Folder.
- You can add folders within folders and use the breadcrumb trail to navigate.
-
Drag and drop folders or content to rearrange them within the Collection.
Using Search to Find Members-Only Content
Members can use the search feature to quickly find any content they have access to across all connected Spaces. Search results are access based, meaning members will only see content included in the plans they’re currently subscribed to.
If you want to make content easier to find, you can add searchable text based tags directly in the content subtitle. For example: [email marketing]
In this case, a member searching for “email marketing” would be able to find that content, even if those exact words do not appear in the main title.

Adding bracketed keyword tags like this is a simple way to improve search accuracy and help members locate more specific topics within your library.
Edit Spaces and Content
- In your dashboard, go to Spaces > Select a Space, Content, or a Folder.
- Click the Edit (pencil) icon.
- Update the title, plan access, visibility, and commenting.
-
Click Update Now.

