
Set up and manage a Community Space
Community Spaces give you a place to start conversations, share updates and resources, and let members participate or create discussions of their own.
Try it yourself — use the walkthrough demo to see how to add a community. Written instructions are also available below.
Create your Community Space
- In your MemberSpace dashboard, go to Spaces.
- Click the + next to Your Spaces to add a new Space.
- Select Community as the Space type.
- Enter a title for your Community Space.
- Choose which plans will grant members access to the Space.
- Choose whether the Space should be visible to members.
- Choose whether or not members can create posts.
- Click Add Now.
Create a post as an admin
Once you have created the Community Space, you can add new posts:
- Open the Community Space and click +New Post.
- Add a title and optional subtitle.
- (optional) Attach a file, add a video link, add a regular link.
- Add body text
- Choose whether to enable comments and reactions.
- Click Add Now.
Members can now view the post by opening the Community Space. If engagement is enabled, they can comment on the post, add reactions, and interact with other members in the comments.
Community Spaces display posts in a chronological feed with newest posts shown first
How to pin a post
Admins can pin important posts to the top of a Community Space, making them easy for all members to find. This is especially useful for a welcome post containing community guidelines or other information members should review before joining the discussion.
- Open the Community Space.
- Locate the post you want to pin.
- Click the three-dot menu for the post.
-
Select Pin Post.
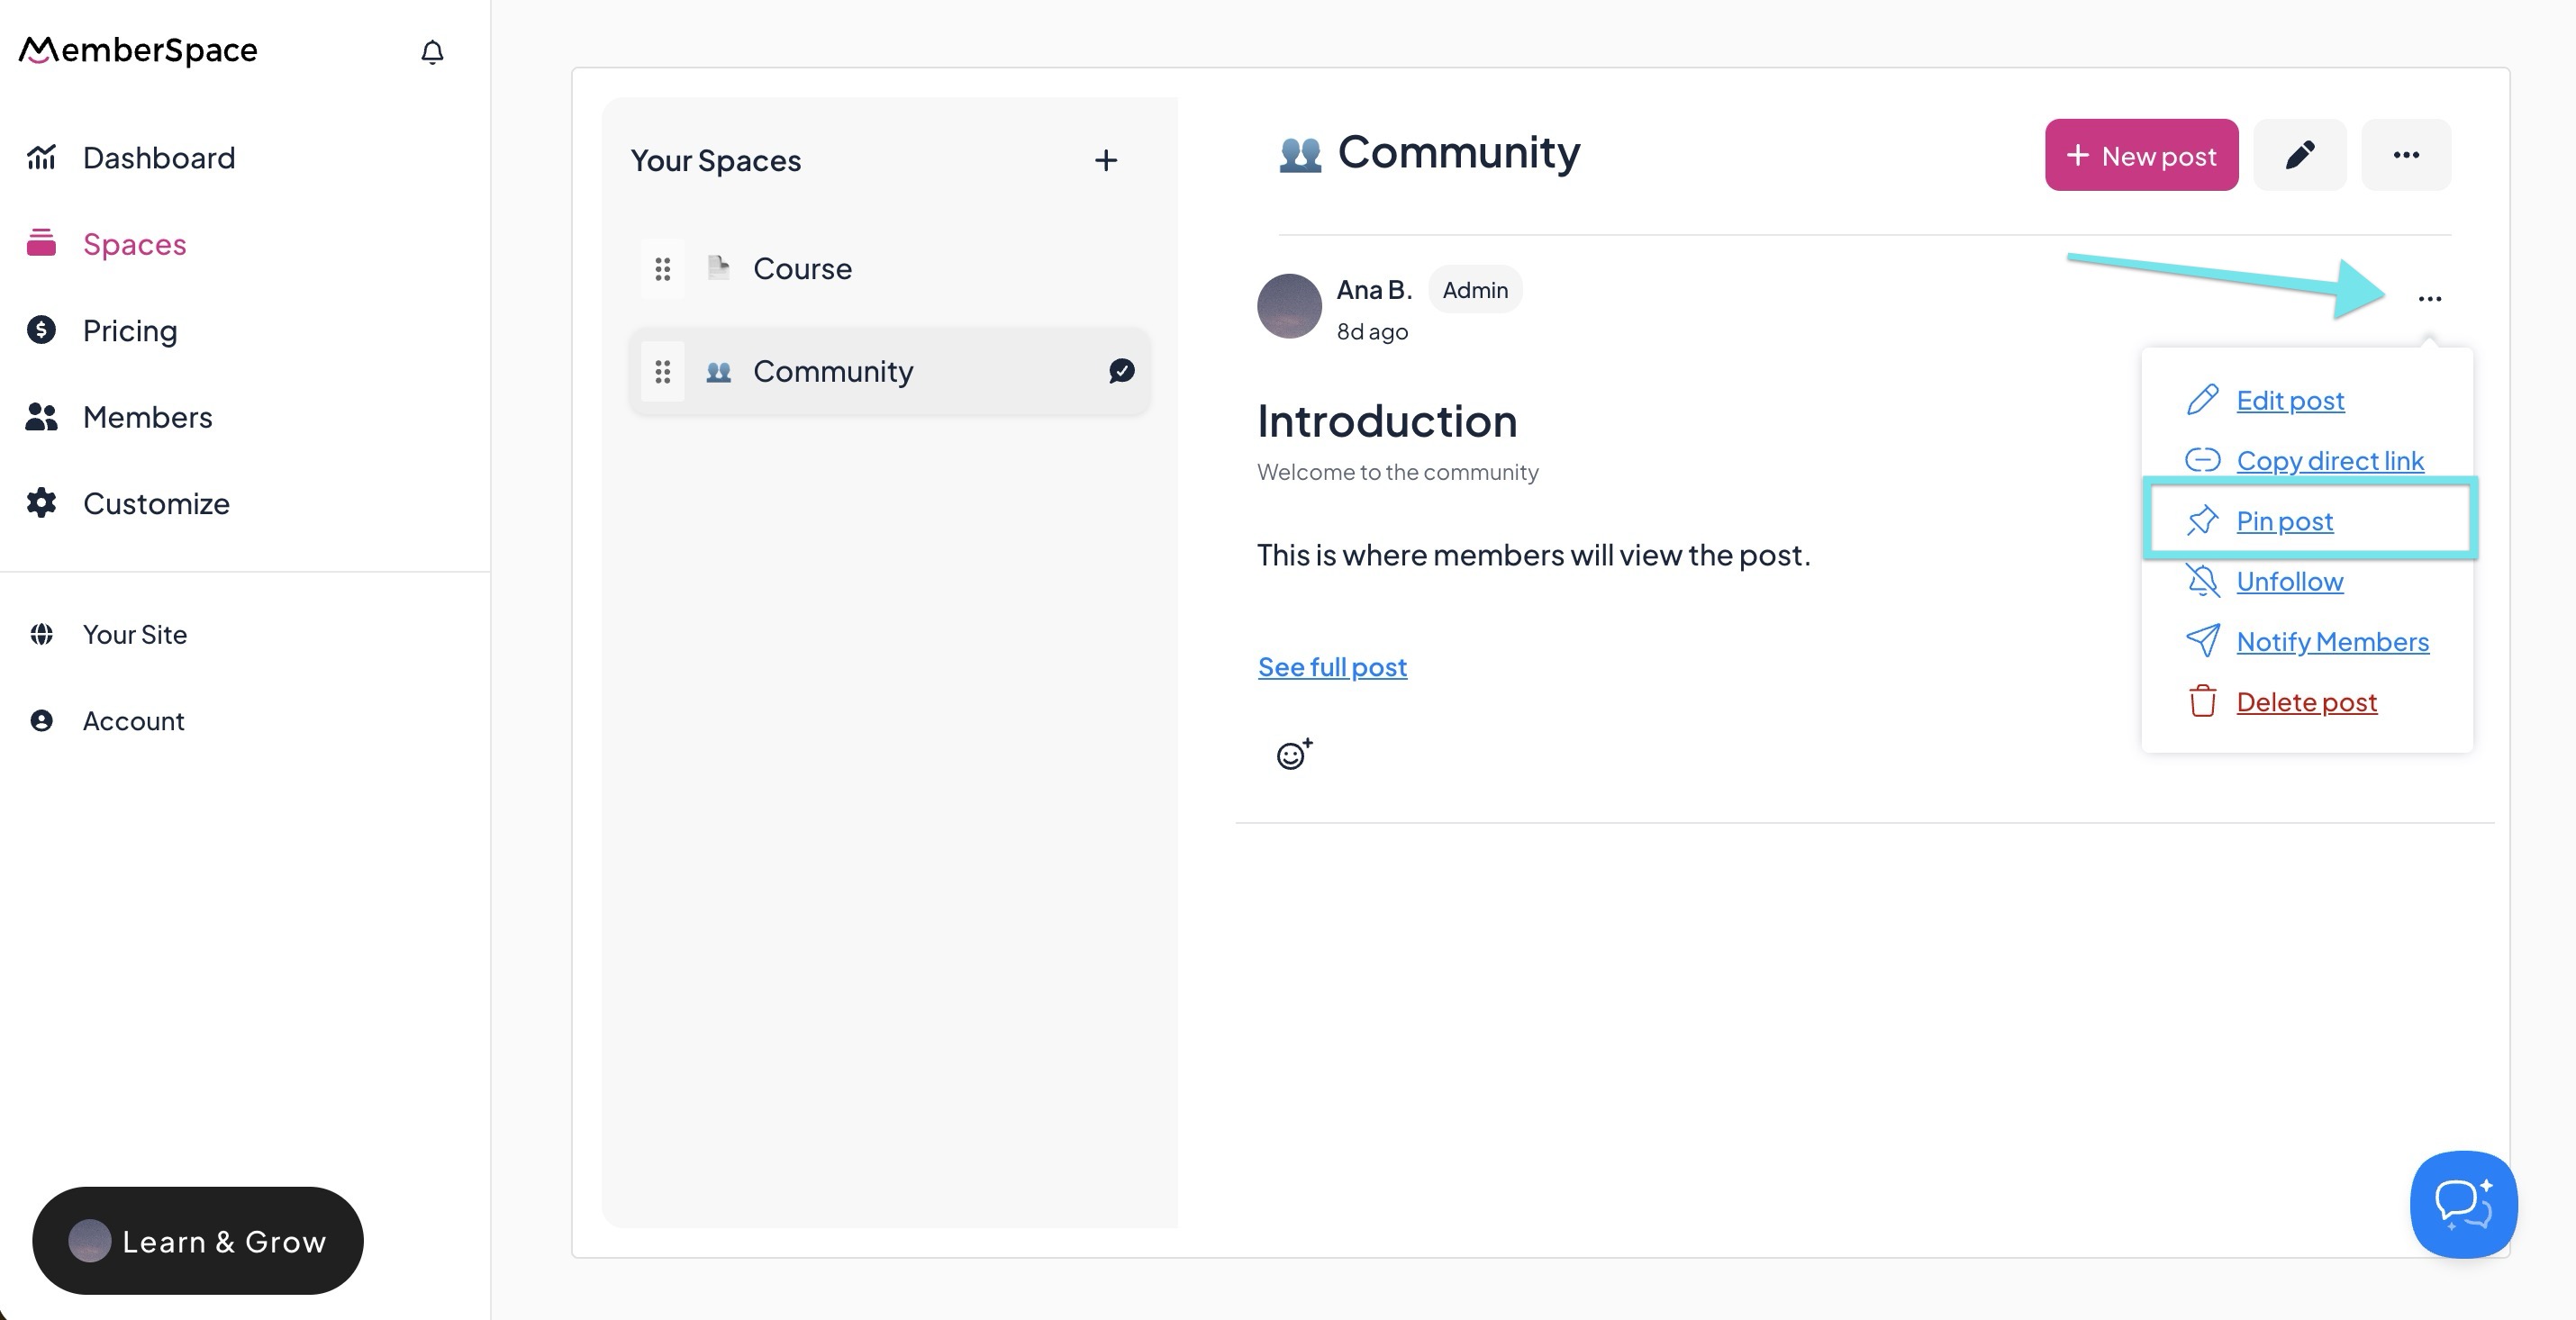
If you are creating a pinned announcement or another read-only post, disable comments and reactions. Only one post can be pinned at a time.
Notify members about new posts
Members will see a notification bubble on the MemberSpace button linking to the What's New feed. They can follow individual posts or the entire Community Space.
- Open the community space and locate the post.
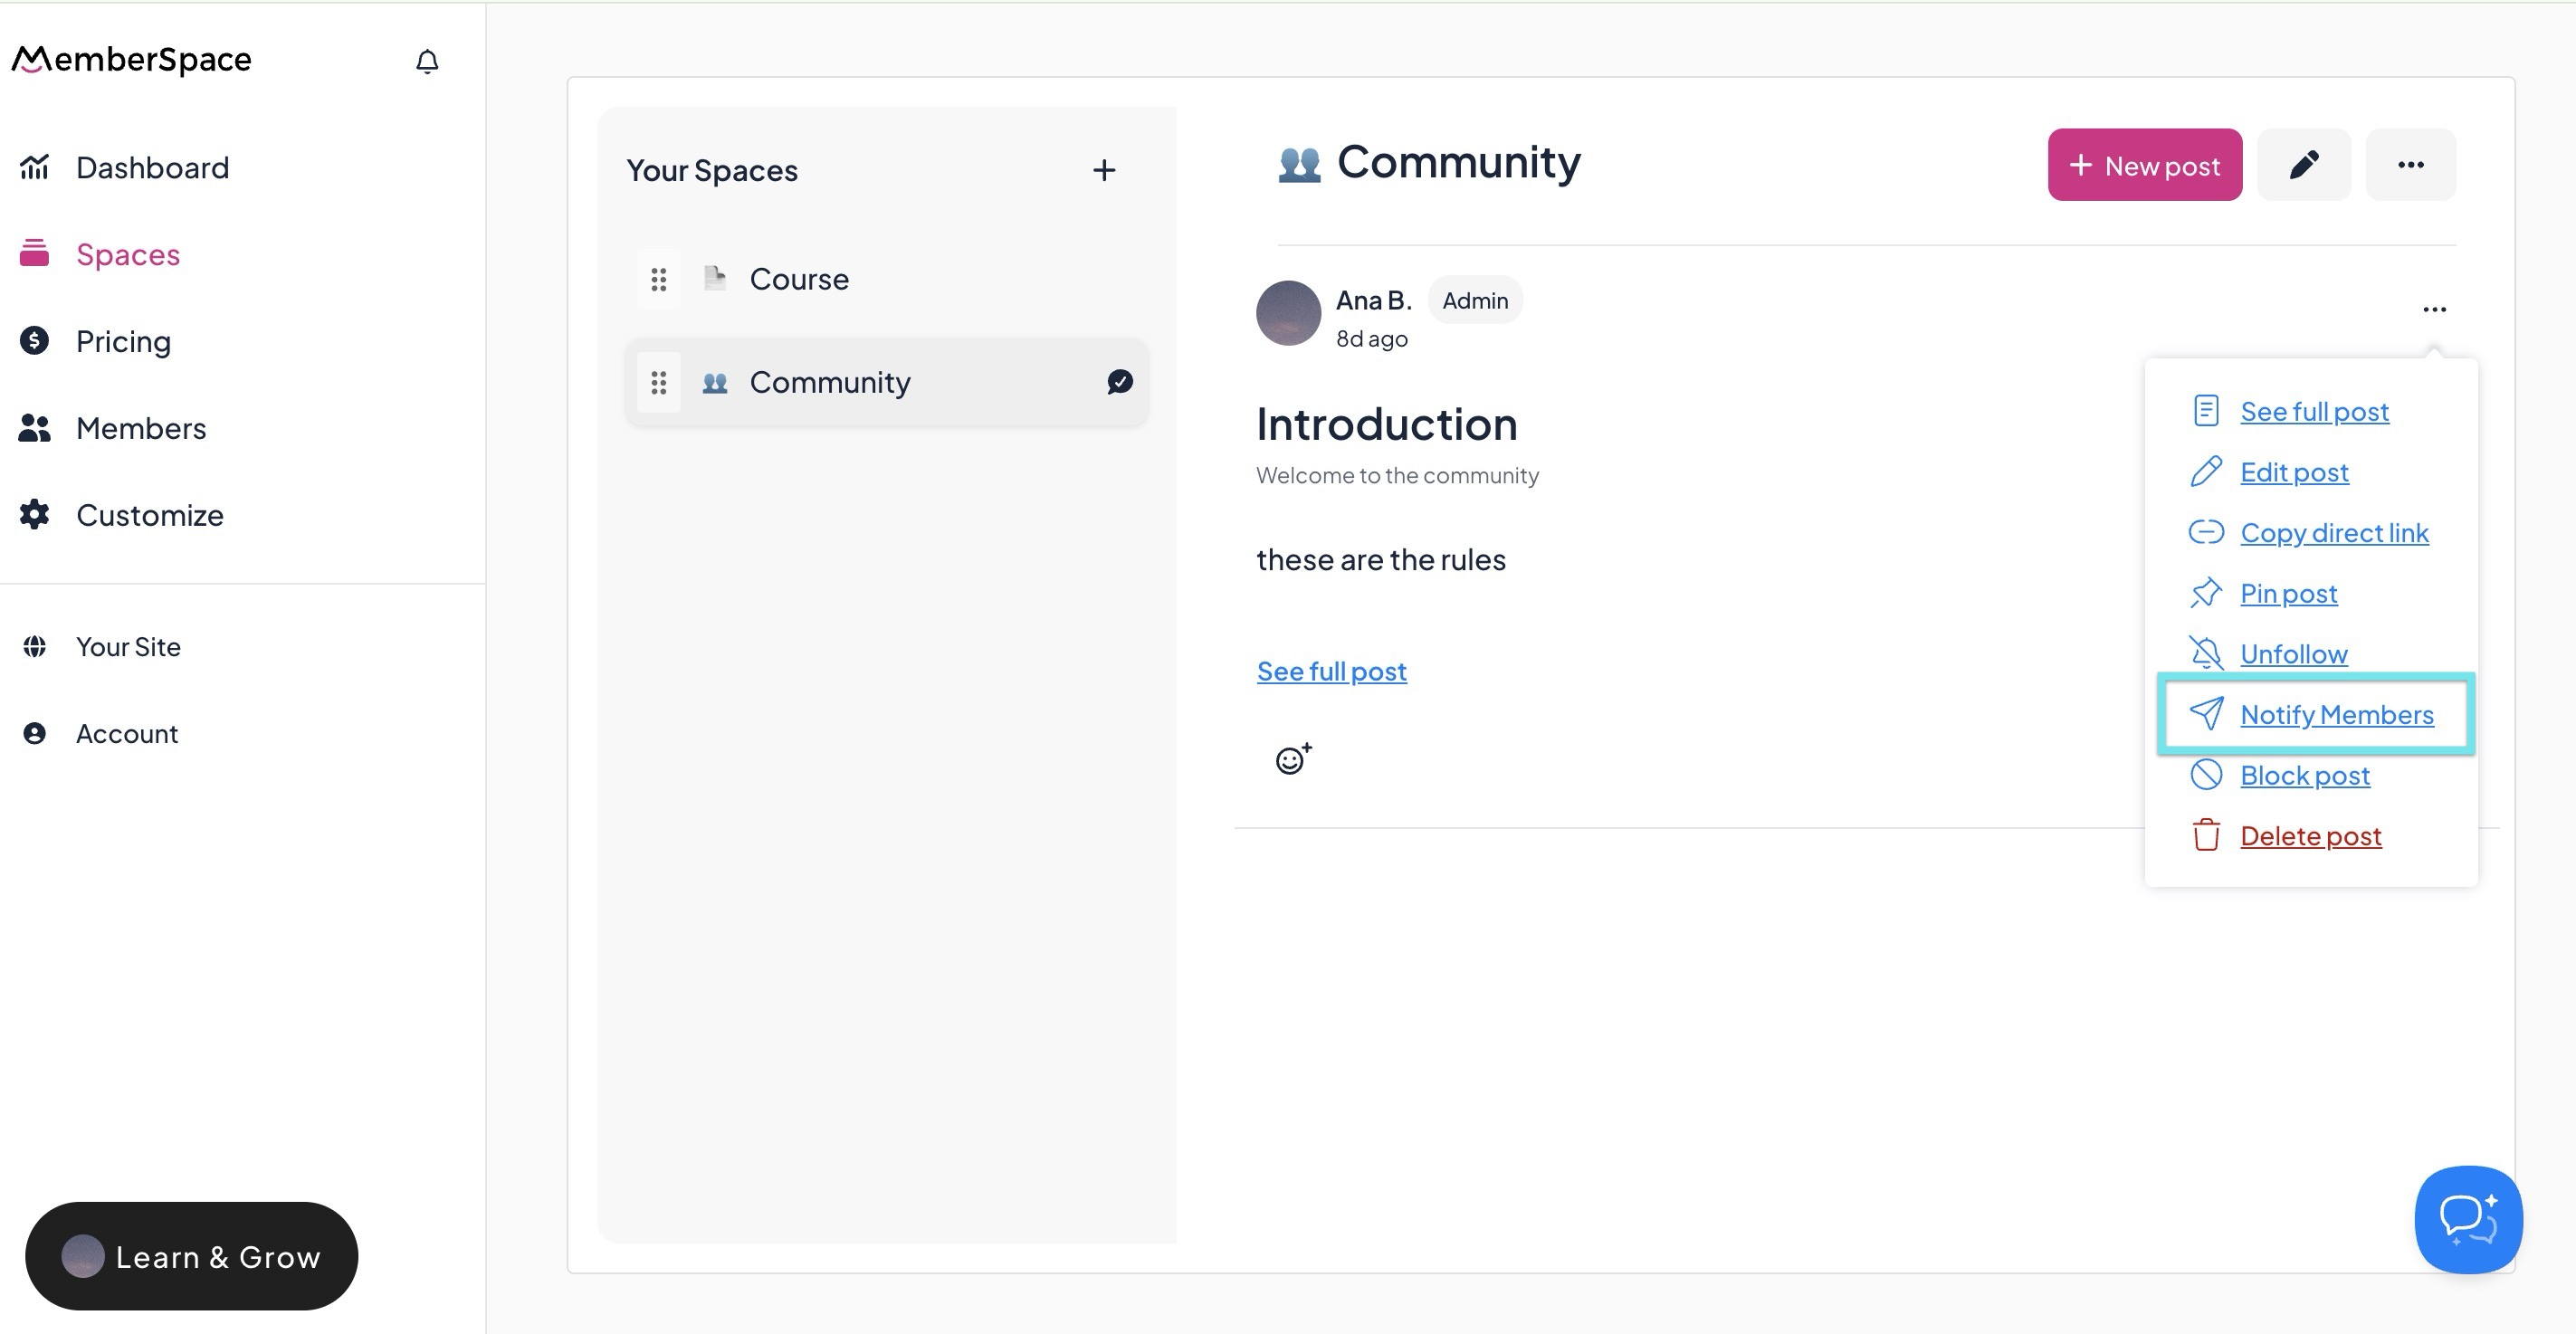
- Click the 3 dots menu for the specific post.
-
Select Notify Members.
Member engagement and community profiles
Members can engage with the Community Space by creating posts, leaving comments, and adding reactions. When a member participates in one of these ways, other members can click their name or profile image to view their community profile.
Members can add a bio to their profile, which will be visible to anyone who views it. A member’s profile will only appear to others after they have created a post, left a comment, or reacted to a post or comment.
Member Participation Requirements
Before a member can post a discussion or comment, they must complete the following steps:
- Agree to the MemberSpace Community Guidelines to set expectations and support healthy discussions.
- (Optional) Set a display name.
Create a discussion post as a member
Members can create their own discussion posts within a Community Space.
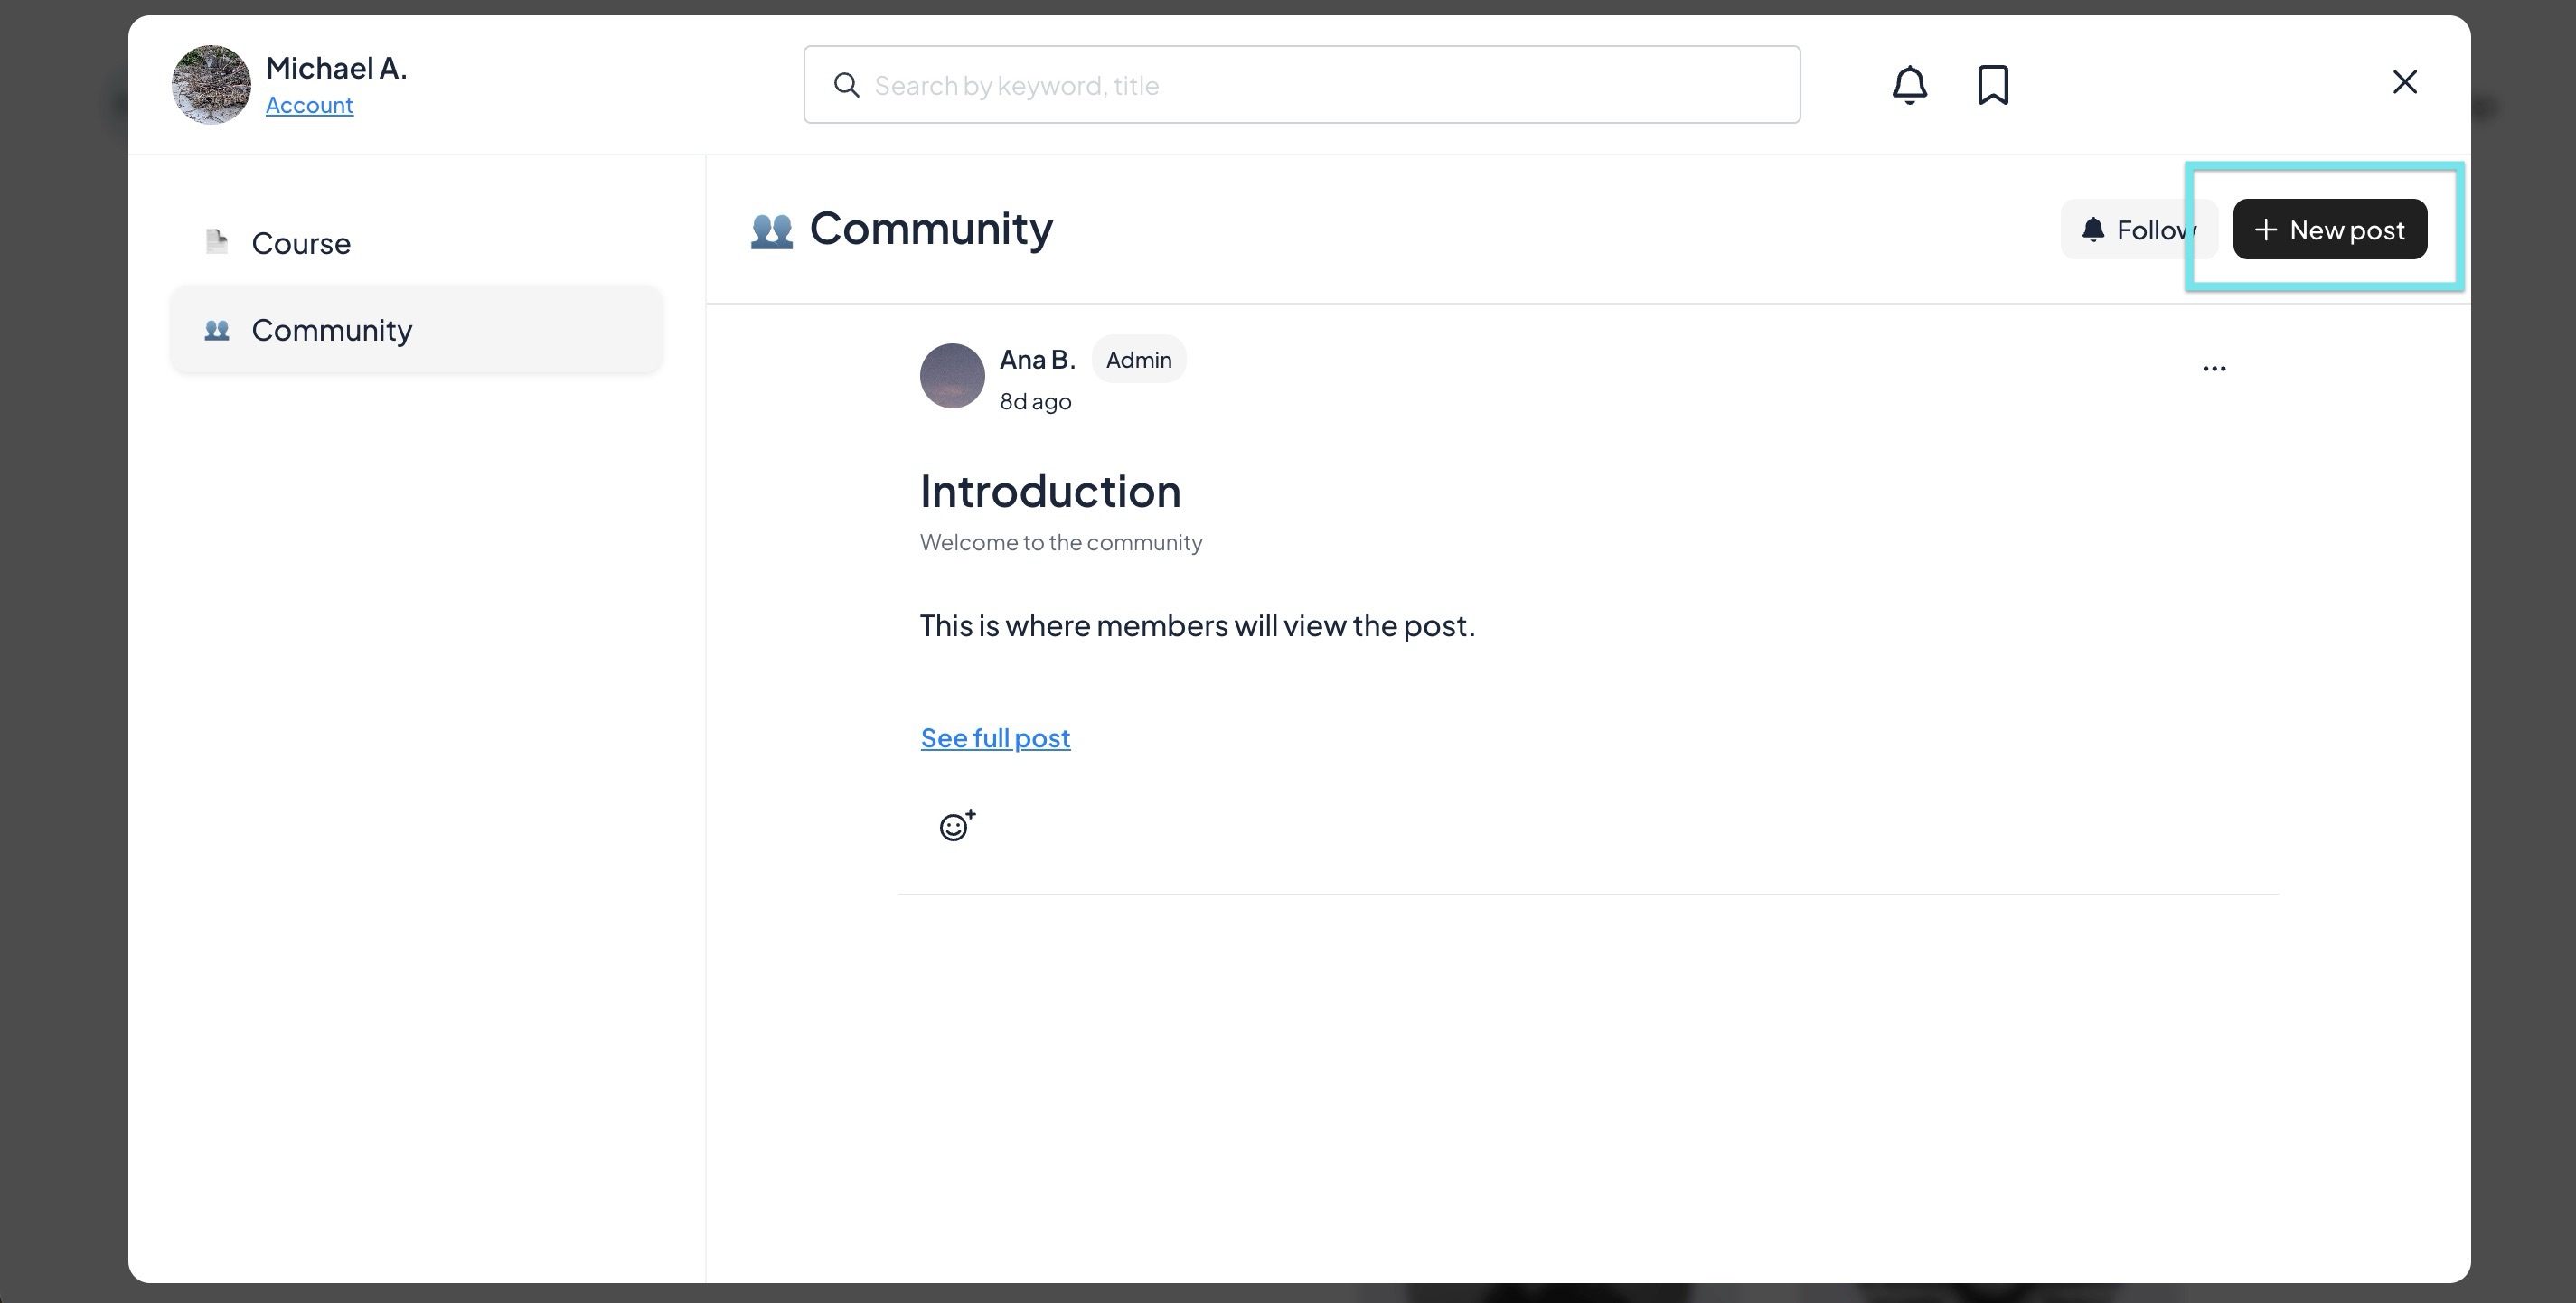
- Open the Community Space.
-
Click + New Post.
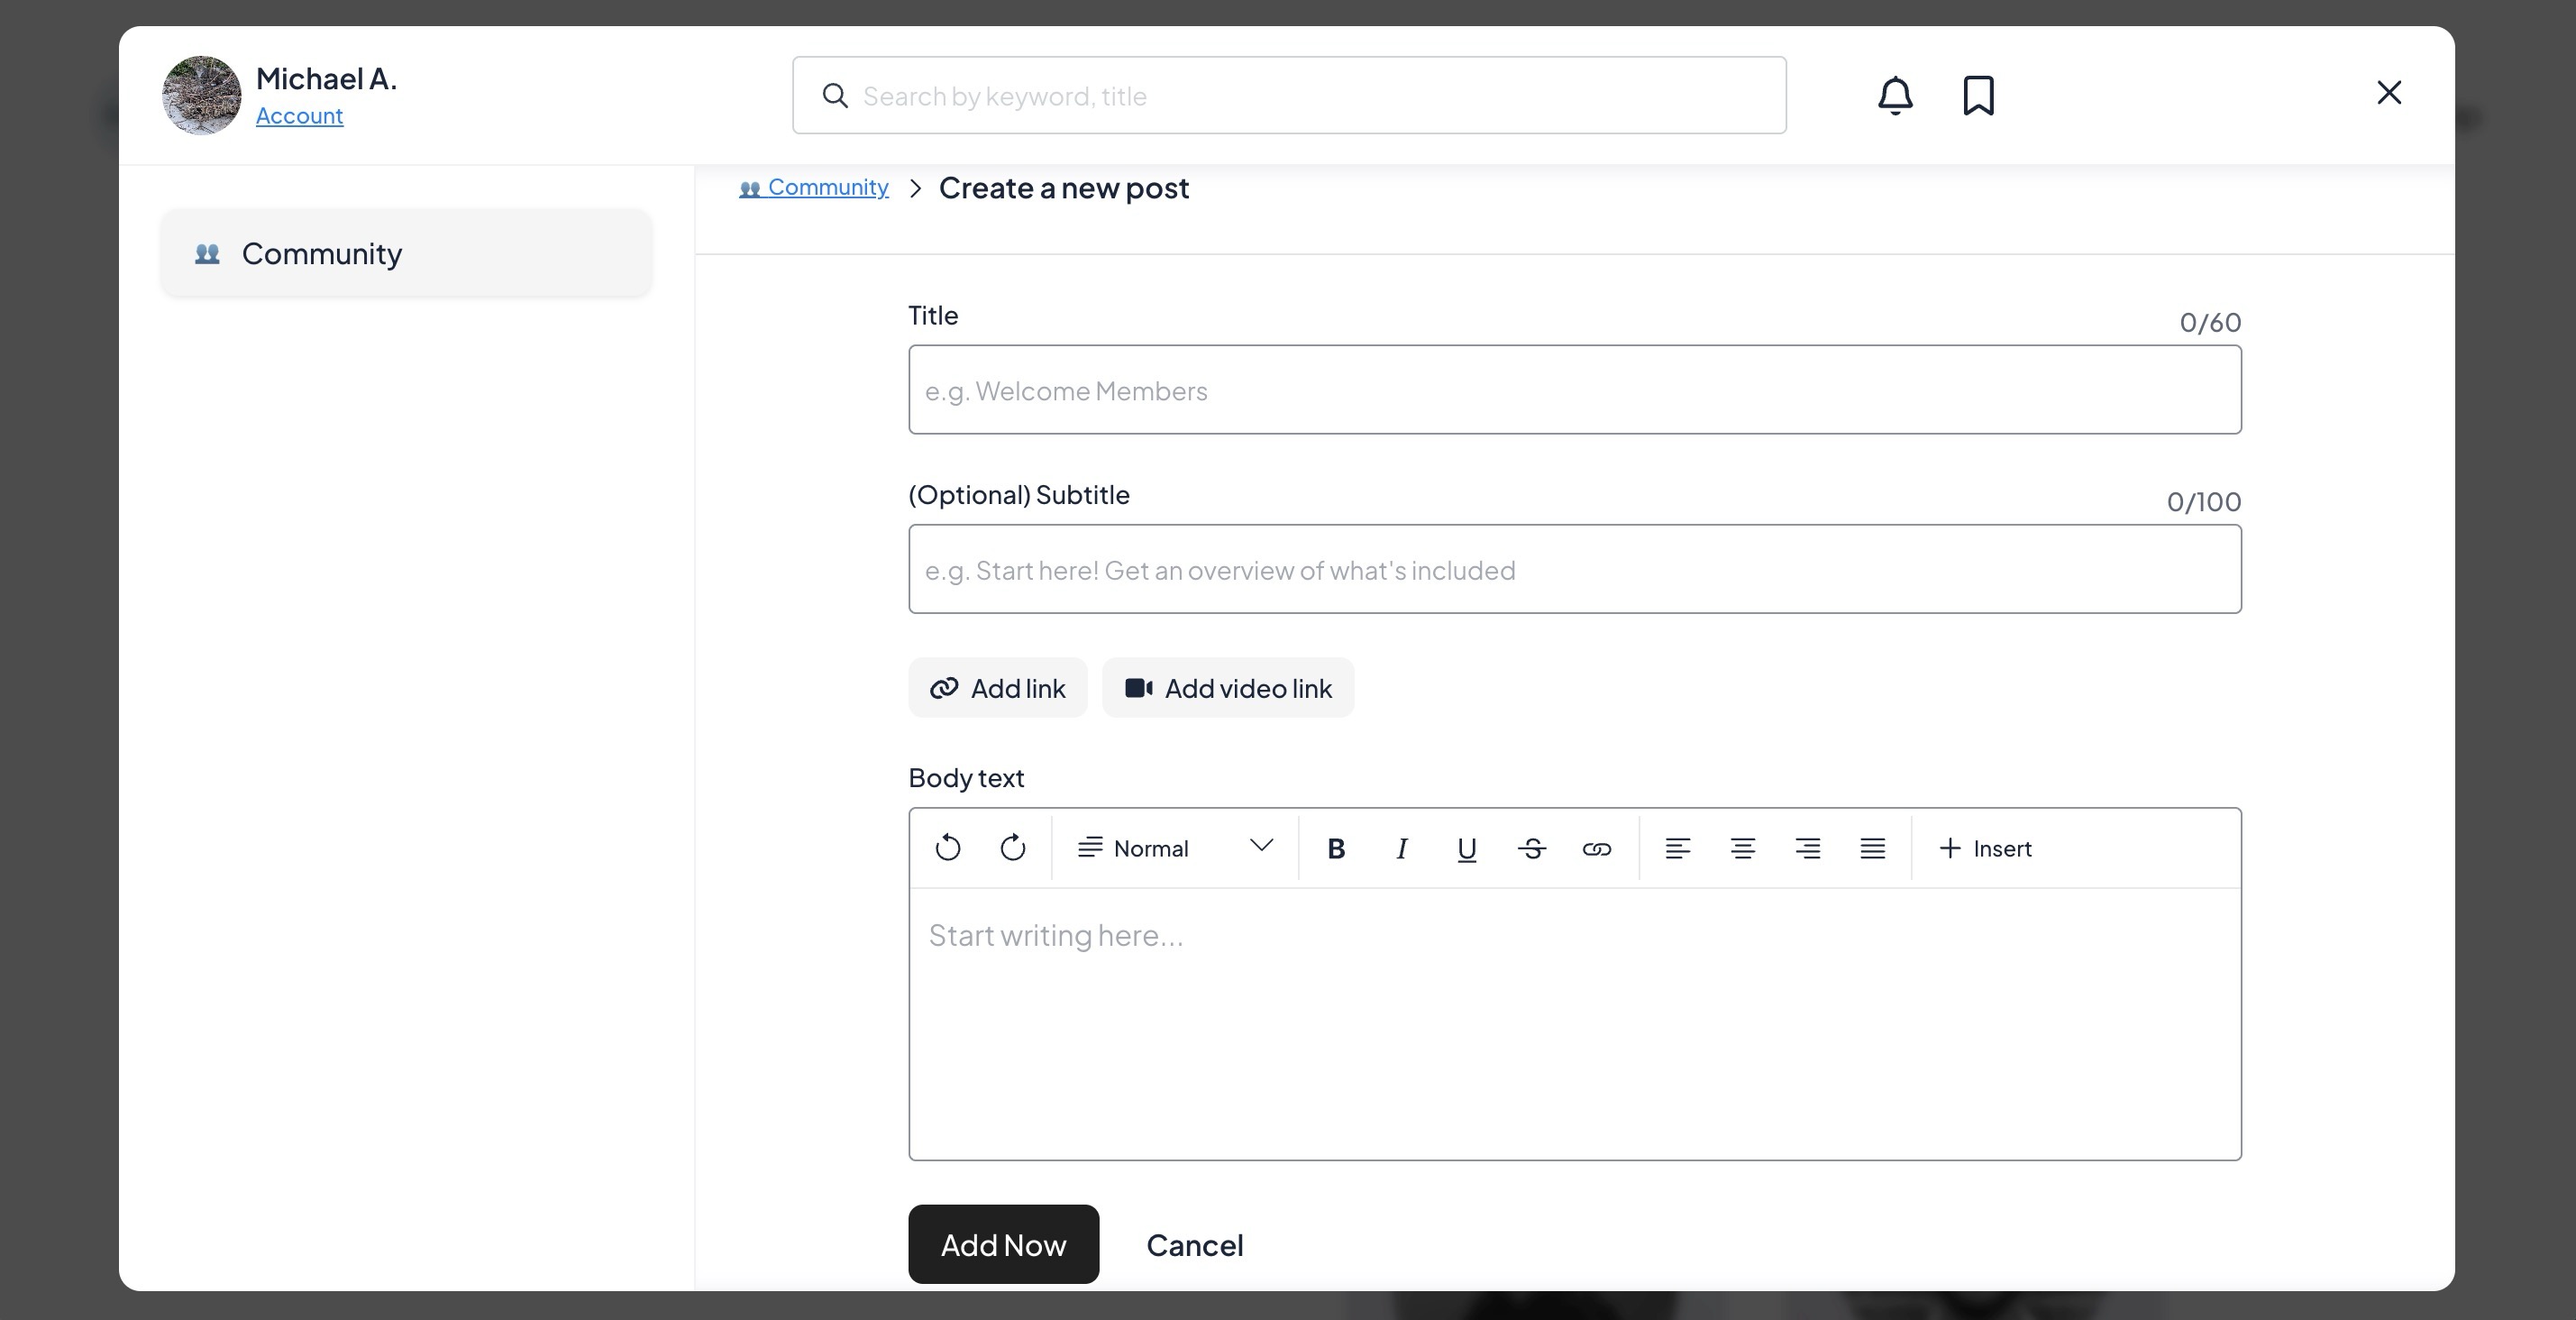
- Add a title and optional subtitle.
- Add content to the post.
-
Click Add Now to publish the post.
In order to participate in this community, members must agree to the community guidelines.
Members cannot upload files but they can share regular links and video links.
Member notifications and following
Members receive notifications in their What’s New feed when a new comment is added to a community post they follow or when a new post is added to a Community Space they follow.
Members automatically follow a post when they comment on it, but they can also manually follow any post. To be notified whenever a new community post is added, members can follow the entire Community Space.
If you want to make sure members are notified you can use the Notify members options.
Activity Feed and Admin Updates
Site owners and admins can monitor new posts, comments, replies, reactions, and other member activity from the Activity Feed in their MemberSpace dashboard.
MemberSpace also sends admins a daily email summarizing recent member activity. This admin email is separate from the Daily Email Summary sent to members about new content and discussions.
Disable the Daily Admin Activity Updates
If you do not want to receive the daily admin email, open your Activity Feed settings and turn off the daily email option.
- Click the alert bell icon in the top left
- Click the 3 dots menu to manage notifications
-
Disable the Get Email Summaries toggle
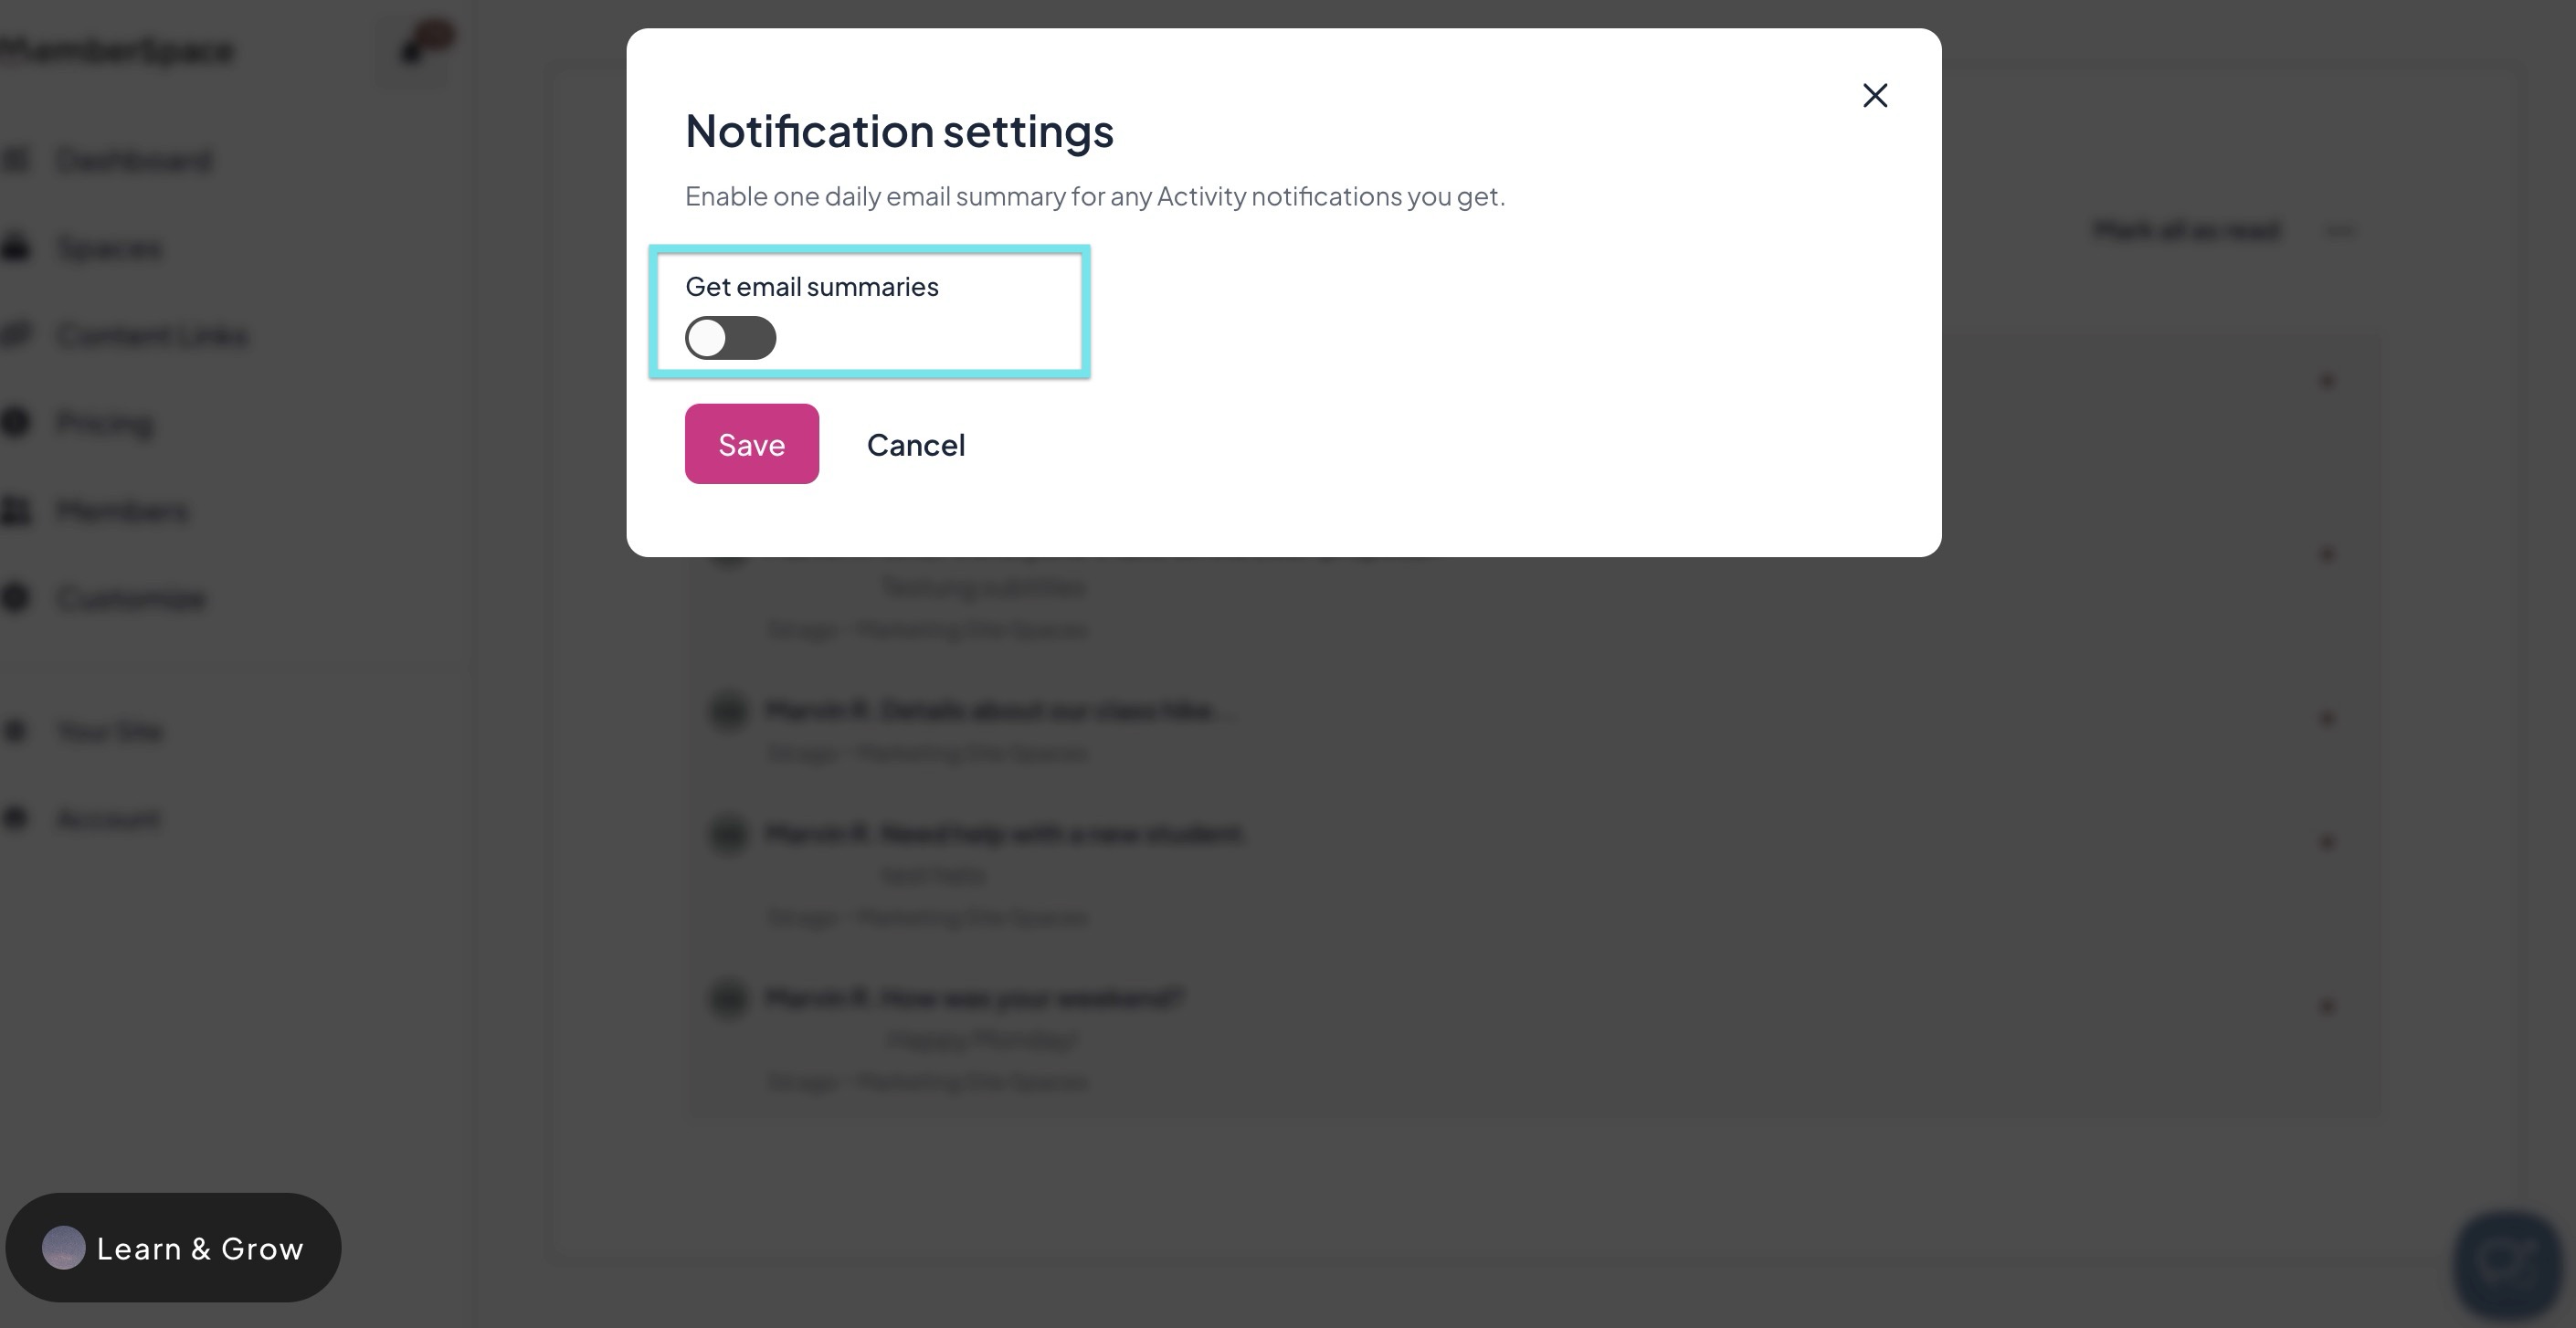
Disabling this email does not remove activity from your dashboard or affect the Daily Email Summary and other notifications sent to members.
Reporting and Moderation
All comments are automatically approved and are posted immediately. Other members can report or flag any comment and share a message to the site owner and admin. Afterwards the site owner and admins are notified through the Activity Feed and via email.
Automatic Blocking
Comments are automatically blocked after two reports. If the site owner/admin unblocks a comment, automatic blocking will resume after repeated reports using an exponential backoff system.
- 4 reports → blocked again
- 8 reports → blocked again
- 16 reports, and so on
Each time the threshold increases exponentially.
Moderation Controls
In order to have full control over moderation decisions, site owners/admins can:
- Unblock comments that were automatically blocked.
- Manually block comments at any time.
- Delete comments at any time.
- Update a member's contribution status